Creating a beautiful wreath doesn't require a green thumb or fresh blooms. Wreaths have become a staple in my home decor. They offer year-round beauty, work with my budget, and can be customized for every season or style preference. They transform my entryway, living spaces, and bedroom with minimal effort. I chose artificial flowers for …

Creating a beautiful wreath doesn’t require a green thumb or fresh blooms.
Wreaths have become a staple in my home decor. They offer year-round beauty, work with my budget, and can be customized for every season or style preference.
They transform my entryway, living spaces, and bedroom with minimal effort.
I chose artificial flowers for my DIY wreaths because they’re incredibly durable, completely reusable, and require zero maintenance.
Unlike fresh arrangements, these easy fake flower wreath designs won’t wilt, drop petals, or need watering. Making my DIY artificial flower wreath is simpler than I initially thought, and the results are stunning.
I can create a gorgeous floral wreath at home using just a few supplies and basic techniques, and so can you!
Why Make a Wreath with Fake Flowers?
Fake flower wreaths offer endless decorating possibilities without the hassle. Unlike real flowers, which wilt and fade, artificial blooms stay vibrant season after season.
This makes them perfect for busy homeowners who want beautiful decor without constant upkeep.
Creating your DIY artificial flower wreath lets you customize colors and styles to match any room or holiday.
These versatile wreaths adapt to your needs whether you’re decorating for spring, fall, or Christmas. Plus, you’ll save money by reusing the same wreath base year after year, simply swapping out flowers when you want a fresh look.
Even beginners can craft a professional-looking wreath in the afternoon.
The materials are affordable, the techniques are simple, and the results are stunning enough to earn compliments from everyone who visits your home.
How I Made a Budget-Friendly, Beautiful DIY Fake Flower Wreath
I love creating floral wreaths—they add a beautiful touch to any space! The best part? They’re super easy and affordable, especially when using artificial flowers.
In this guide, I’ll walk you through exactly how I made mine so you can craft one, too!
Tools & Materials Required
| Category | Items |
|---|---|
| Wreath Base | Wire hanger (or pre-made wire wreath frame) |
| Flowers | 15-18 bunches of artificial flowers (peonies, daisies, daffodils, etc.) |
| Greenery | Optional: Faux leaves, eucalyptus, ferns for a natural look |
| Tools | Wire cutters, pliers, scissors |
| Adhesives | Hot glue gun & glue sticks (optional for extra security) |
Step-by-Step Instructions to Make My DIY Flower Wreath
Step 1: Making My Wire Wreath Base

I started with a wire hanger and bent it into a circular shape. I pressed it around the outside of a 5-gallon bucket to get a nice even circle—such an easy trick!
Then, I twisted the ends together to close the loop and ensured it was sturdy.
Step 2: Prepping My Flowers
I cut each flower using wire cutters from the main stem, leaving 4 to 5 inches of stem so I could attach them easily. I made sure to keep some leaves for a more natural look.
To prevent the flowers from sliding around, I bent the end of each stem into a small loop—this helped them stay in place later!
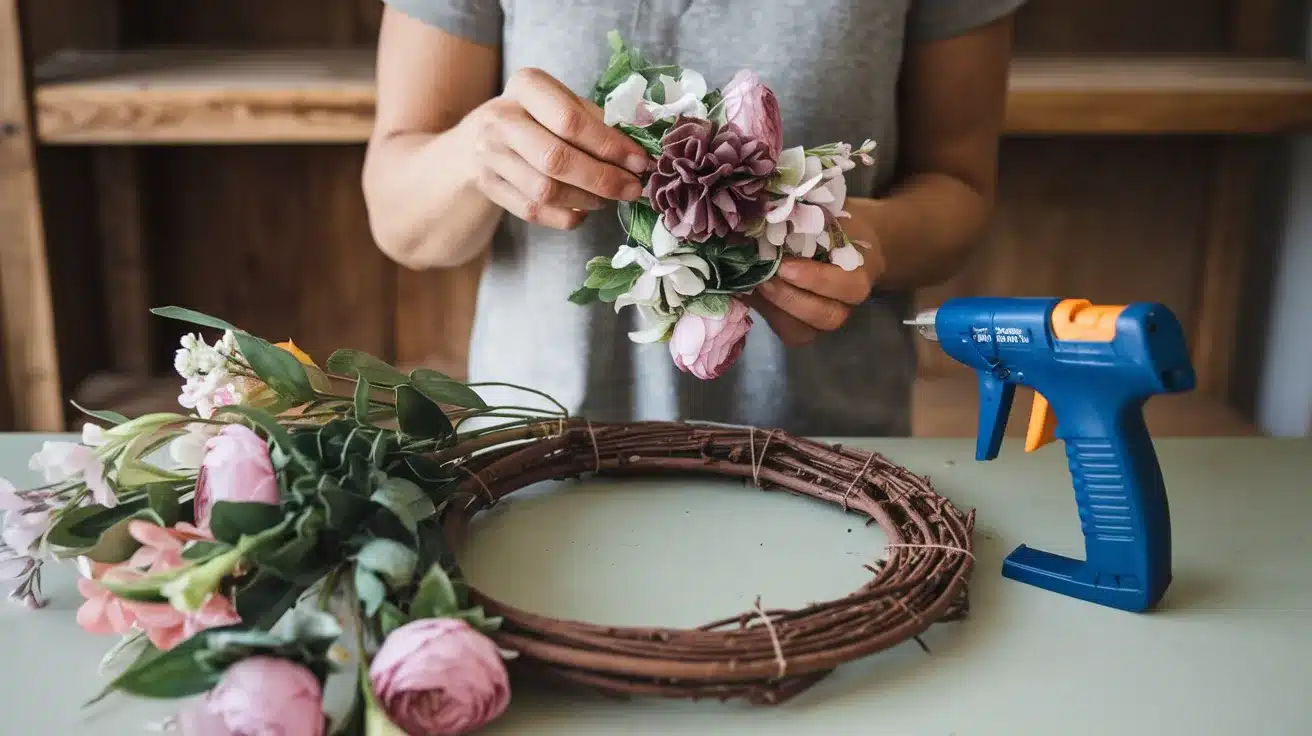
Step 3: Attaching the Flowers
Now for the fun part! I started threading the flower stems through the wire frame, using the loops I made in Step 2 to keep them secure. I alternated colors and flower types to get a balanced look as I went.
If any flowers felt loose, I used floral wire or hot glue to hold them in place.
Step 4: Adding Greenery for a Fuller Look
I tucked in greenery and filler flowers between the larger blooms to give my wreath more depth. I used eucalyptus and ferns, ensuring they followed the wreath’s curve.
This helped add dimension and make everything look lush!
Step 5: Barricading & Adjusting My Flower Placement
Once all the flowers and greenery were attached, I stepped back to check for any gaps. If something didn’t look quite right, I gently twisted stems to reposition the flowers so they faced outward.
Any loose pieces got an extra dab of hot glue or were twisted tighter onto the frame.
Step 6: Fluffing & Shaping the Wreath

I carefully fluffed and adjusted the flowers and leaves to ensure that the wreath looked nice full and attractive. Examining from different angles helped me spot any any areas that needed tweaking.
After a few final adjustments, it was almost ready to hang!
Step 7: Hanging & Enjoying My Handmade Wreath!
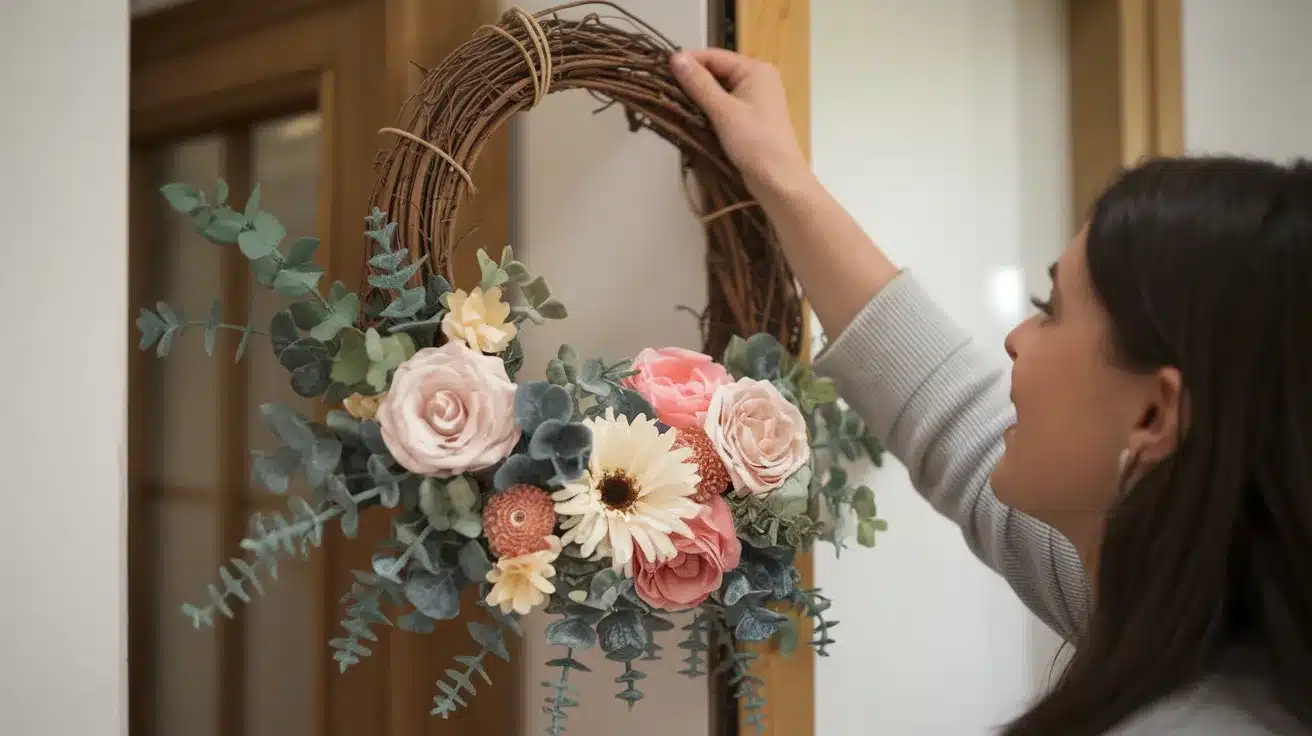
My beautiful DIY floral wreath was finally done! I used the hanger hook as a built-in way to hang it, but you could also attach a ribbon bow for a decorative touch.
I hung mine on the front door, but it would look amazing over a mantel or gallery wall!
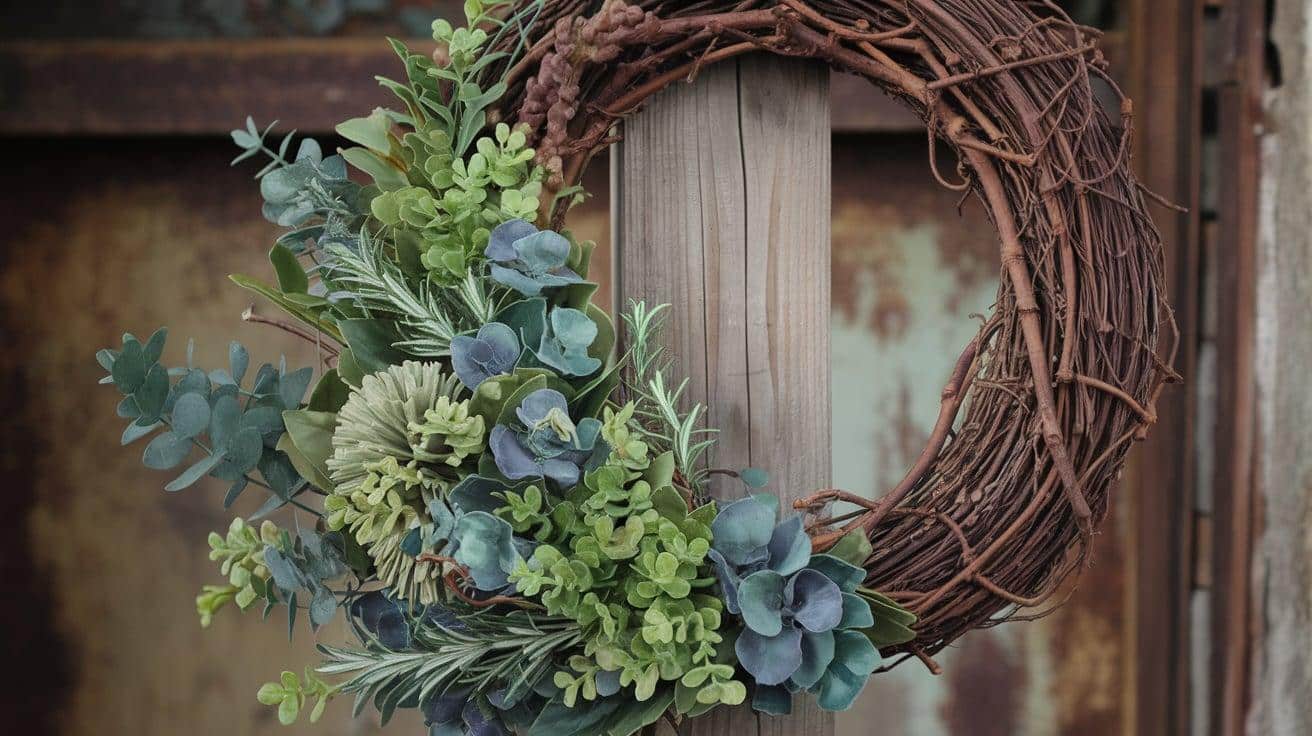
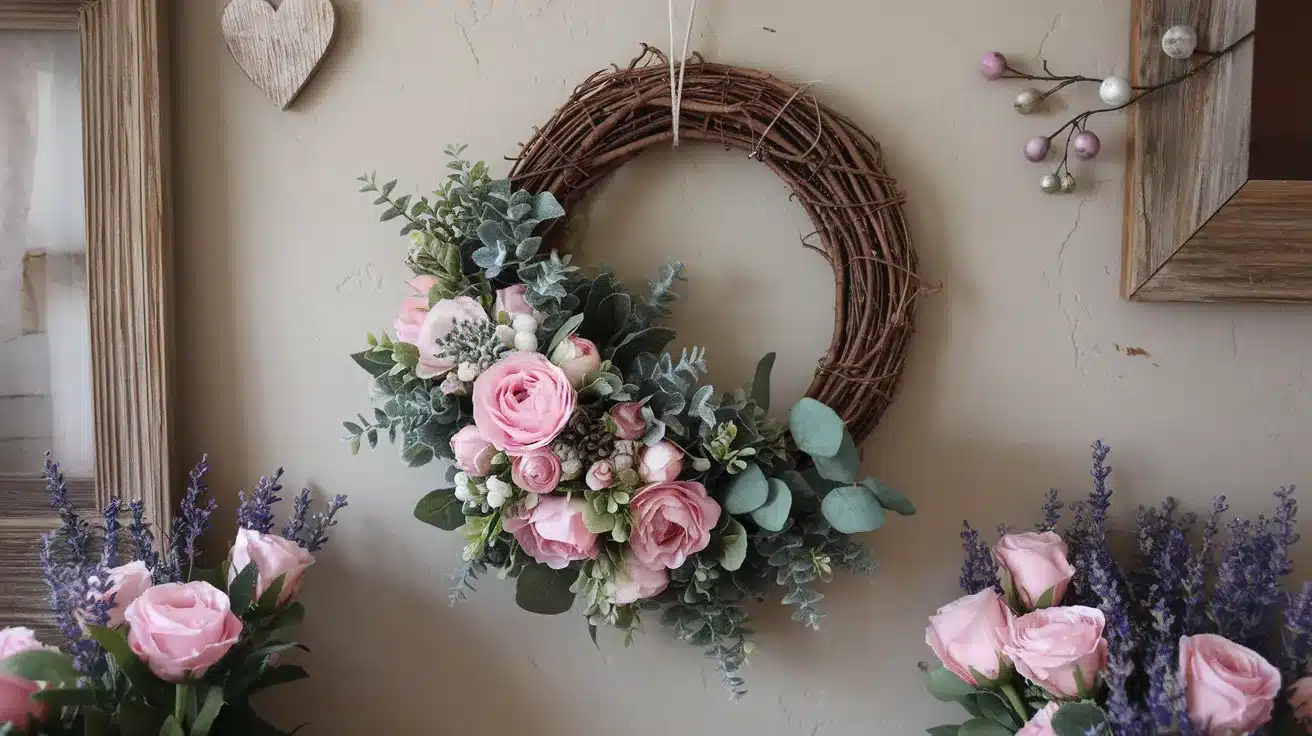
Other Top Recommendation: Spring Grapevine Wreath with Faux Florals
Creating a gorgeous floral wreath is easier than you think!
Follow these seven simple steps to craft a high-end, gorgeous wreath to brighten any space.
Tools & Materials Needed
| Category | Items |
|---|---|
| Wreath Base | 14-inch Grapevine Wreath |
| Greenery | Ruscus Stem, Maidenhair Fern, Eucalyptus (Seeded) |
| Flowers | Pink Peony, Dogwood, White Anemone, Sedum Stems, Dusty Miller with Pink Berries, White Cabbage Rose |
| Adhesives & Tools | Hot Glue Gun & Glue Sticks, Floral Wire, Wire Cutters, Scissors |
| Additional Embellishments | Ribbon (Optional) |
Step-by-Step Instructions to Make Your DIY Floral Wreath
Step 1: Prepare Your Wreath Base
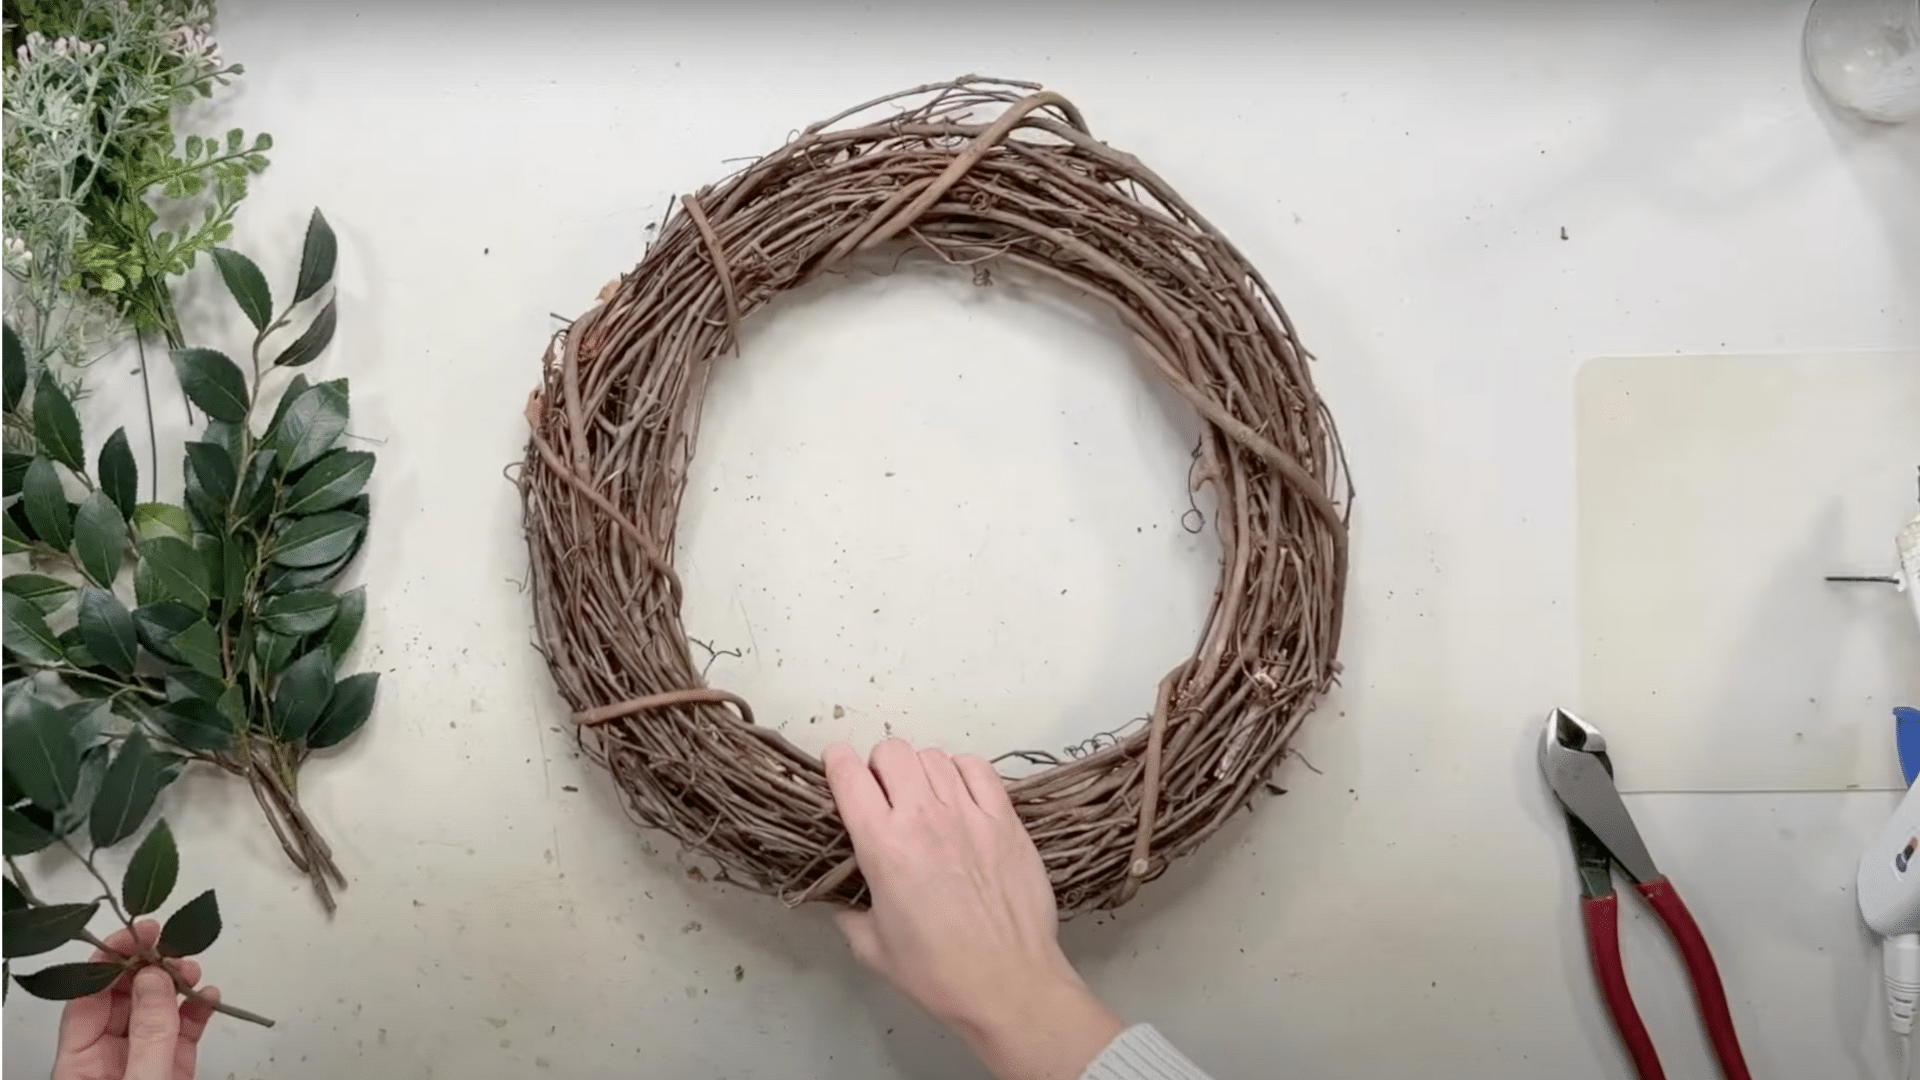
Before adding any florals, clean up the grapevine wreath by removing any loose twigs or debris.
Decide which part of the wreath will be exposed and where the floral arrangement will be placed.
Step 2: Attach the First Layer of Greenery
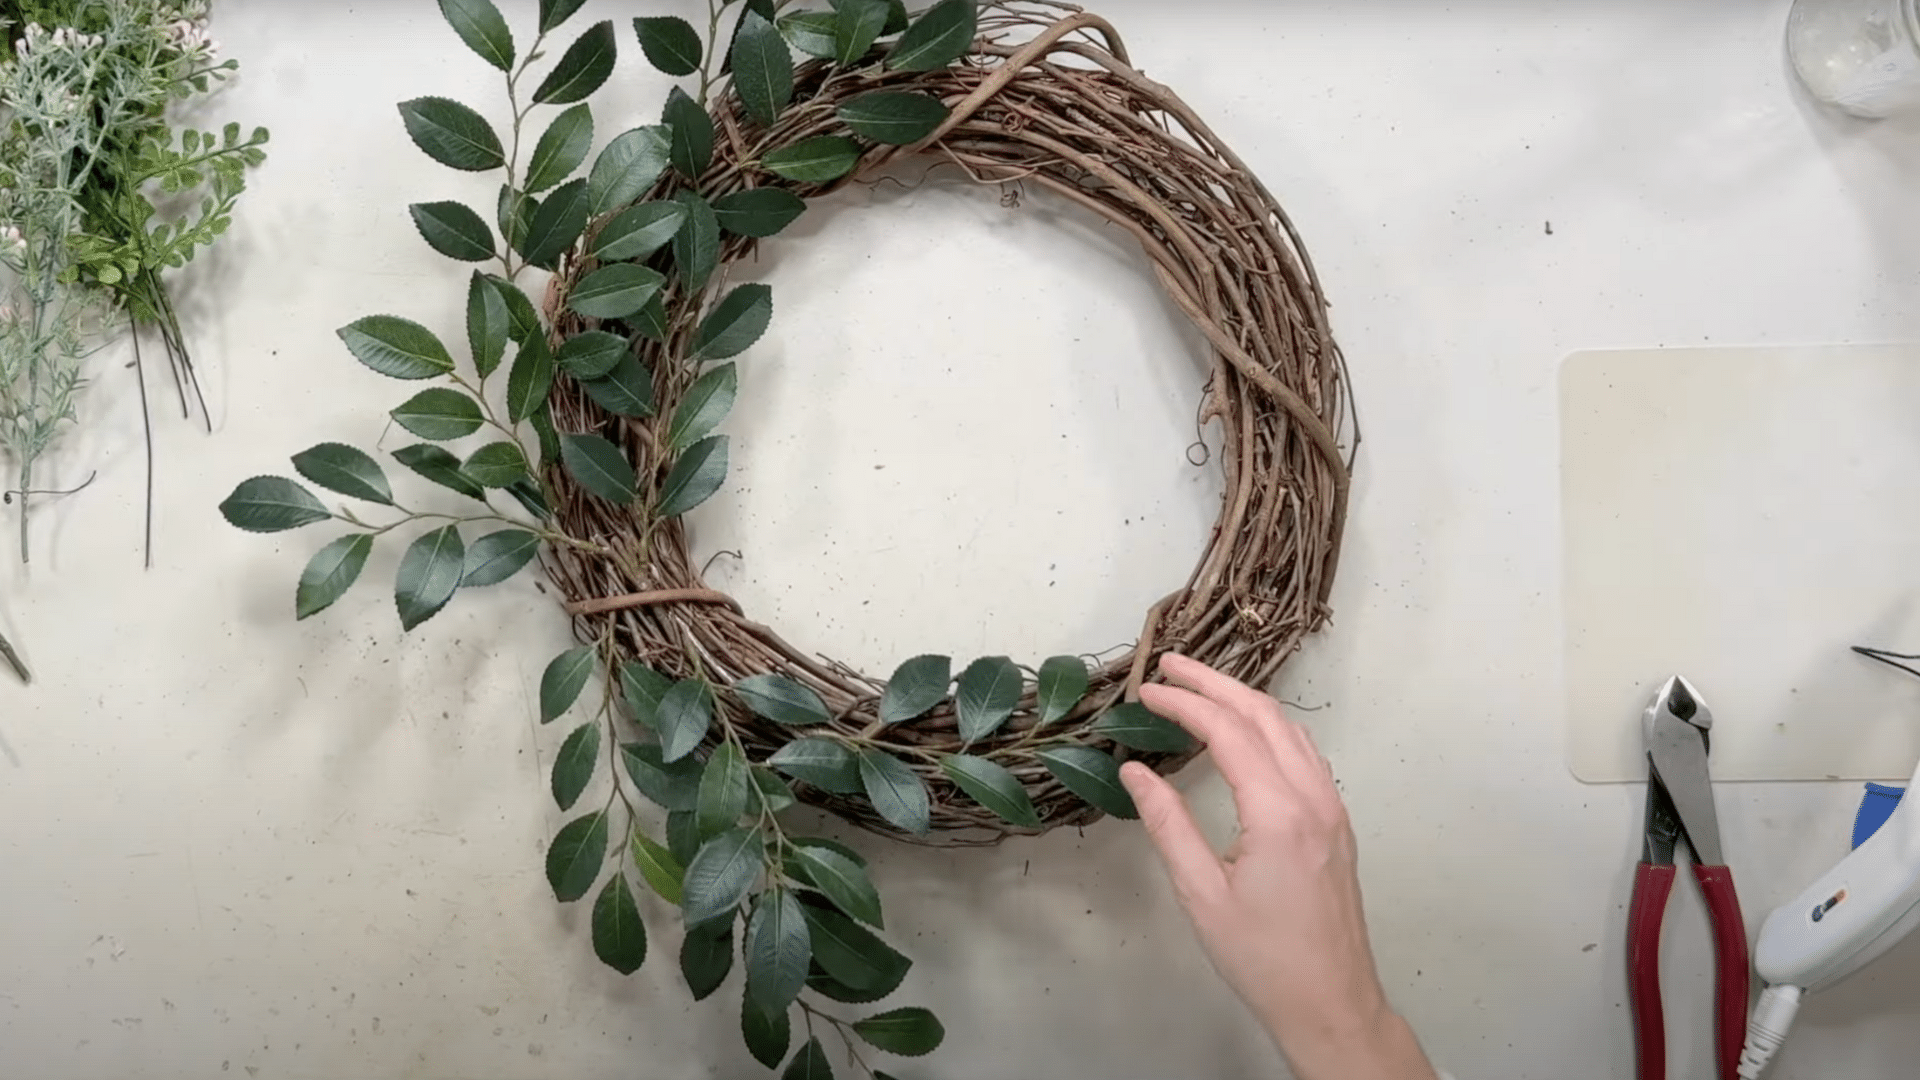
To create the foundation, start with the ruscus stems. Secure each stem using hot glue, ensuring it follows the wreath’s natural curve.
Position the greenery asymmetrically, allowing some leaves to extend beyond the edges for a natural look.
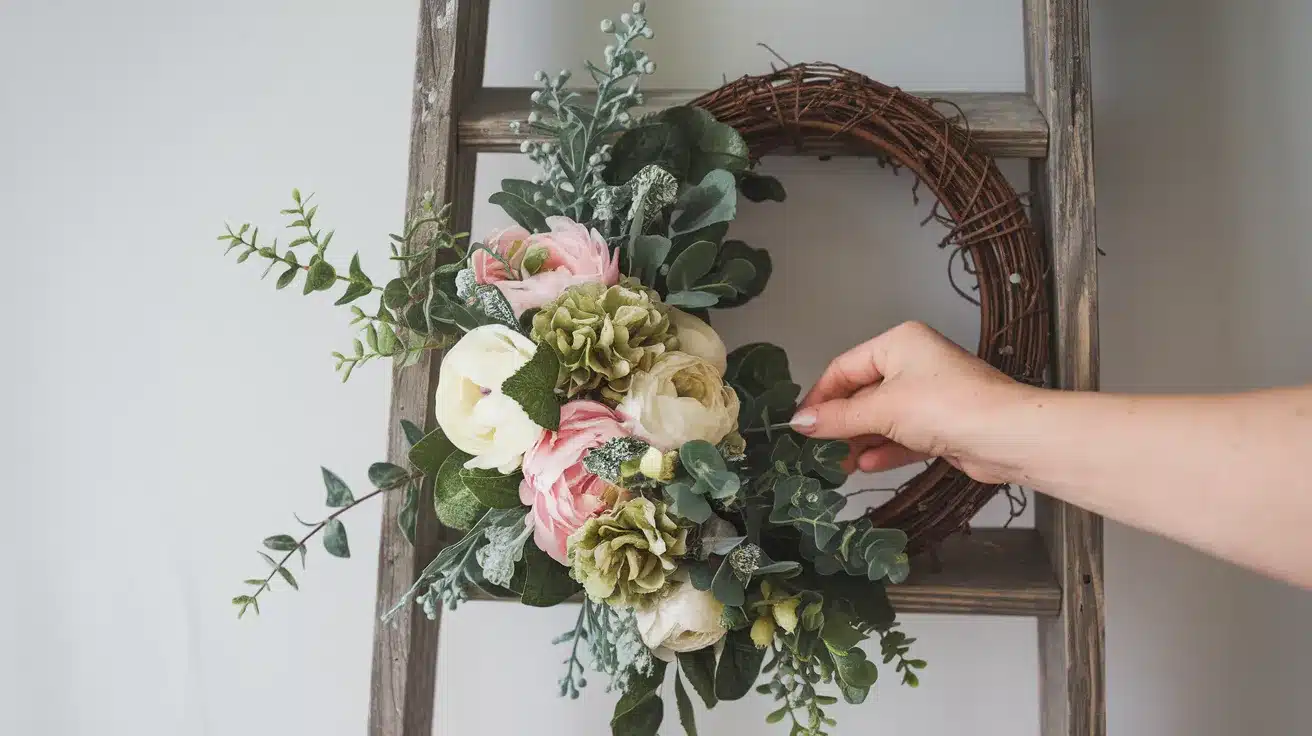
Step 3: Add the Second Layer of Greenery
Introduce maidenhair fern and eucalyptus to create depth and variation. Use darker shades first, then lighter greens.
The eucalyptus should be positioned a few inches from the center to create a balanced, organic flow.
Step 4: Place the Focal Flower – The Pink Peony
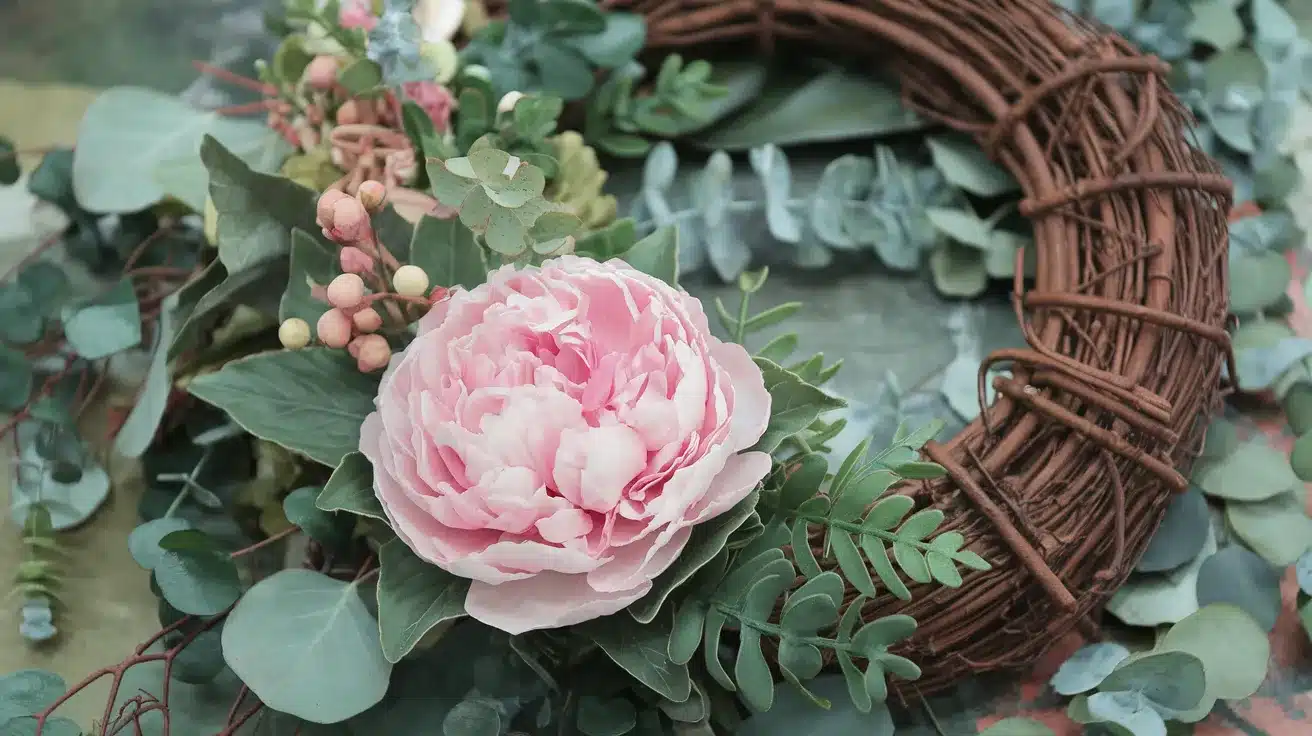
Gently separate the peony stem to have both the flower and its bud. Secure the main flower in the center of your greenery arrangement, slightly off-center, for a natural effect.
Place the peony bud higher up to balance the design.
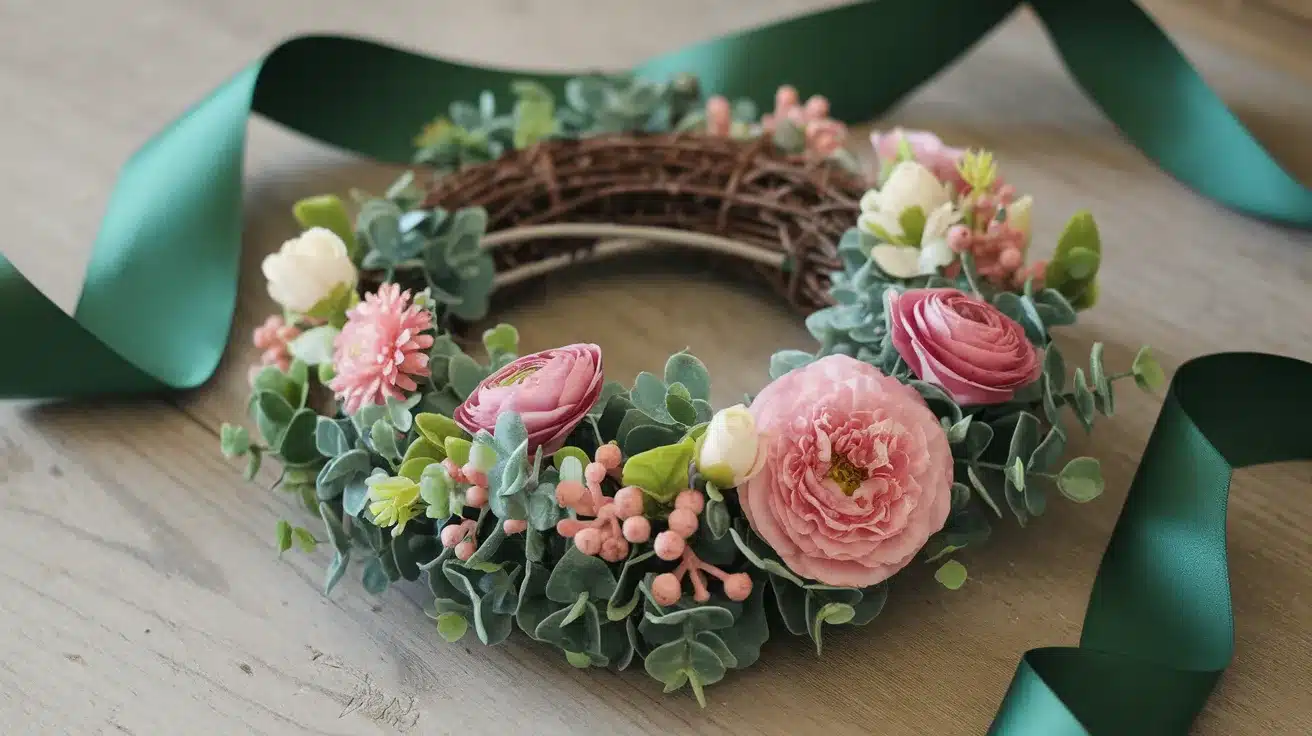
Step 5: Incorporate Complementary Flowers
Add supporting florals like dogwood, white anemone, and sedum stems. Arrange these strategically around the focal flower to enhance the composition.
For a seamless look, repeat small color accents throughout the wreath.
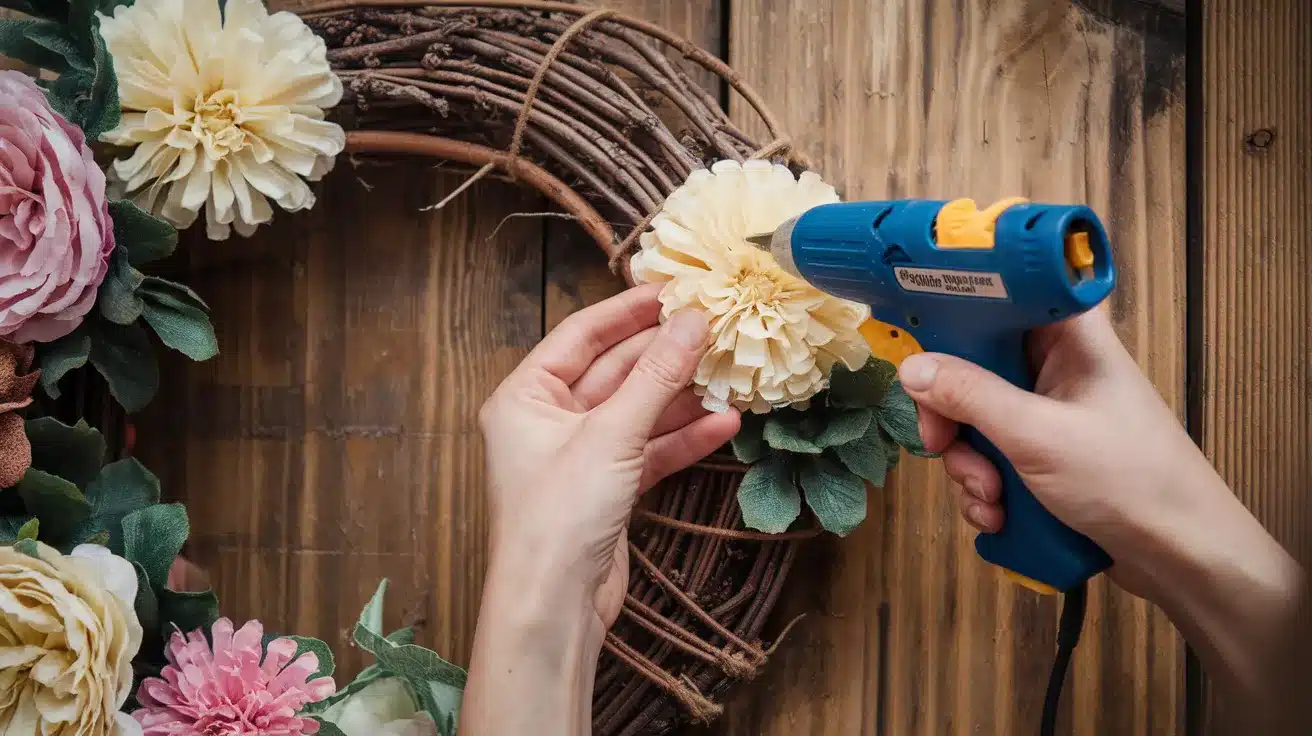
Step 6: Add Final Floral Details & Texture
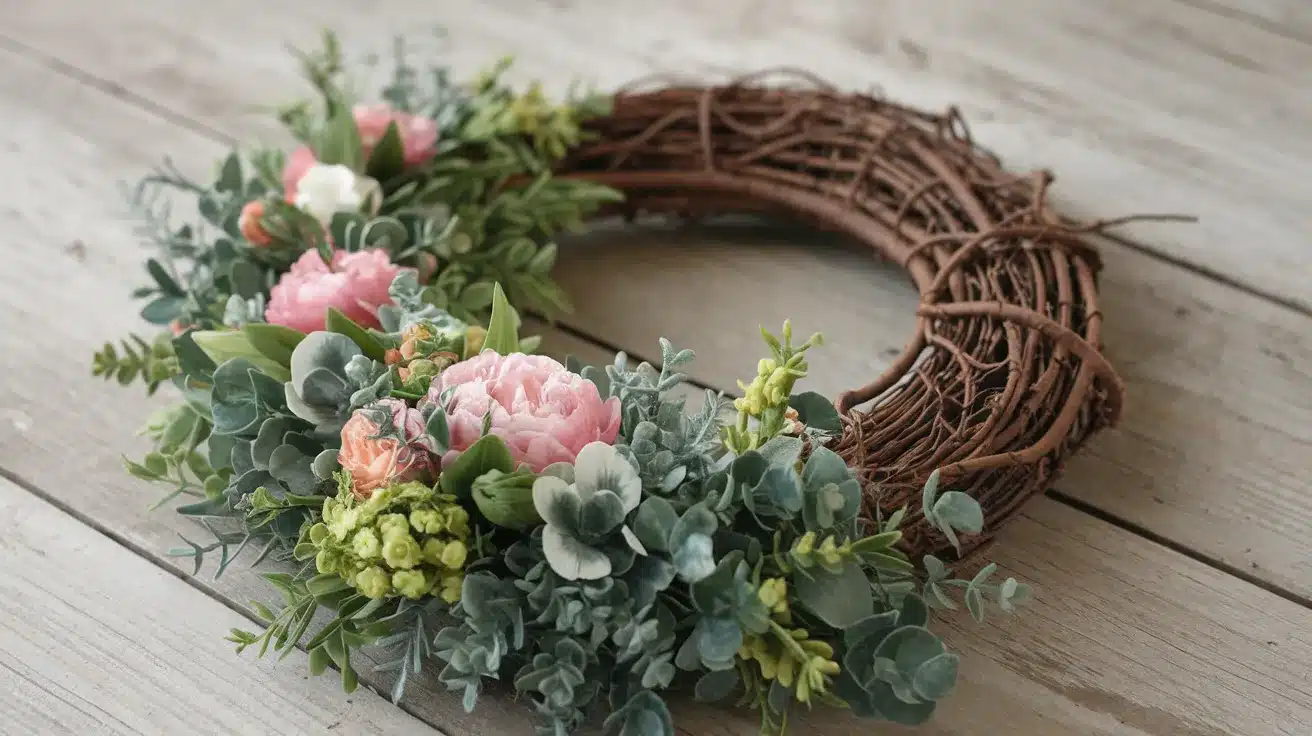
Introduce dusty miller with pink berries and a white cabbage rose for contrast. Ensure the textures and colors blend harmoniously.
If needed, bend the flower stems slightly to adjust their positioning.
Step 7: Secure Everything & Final Adjustments
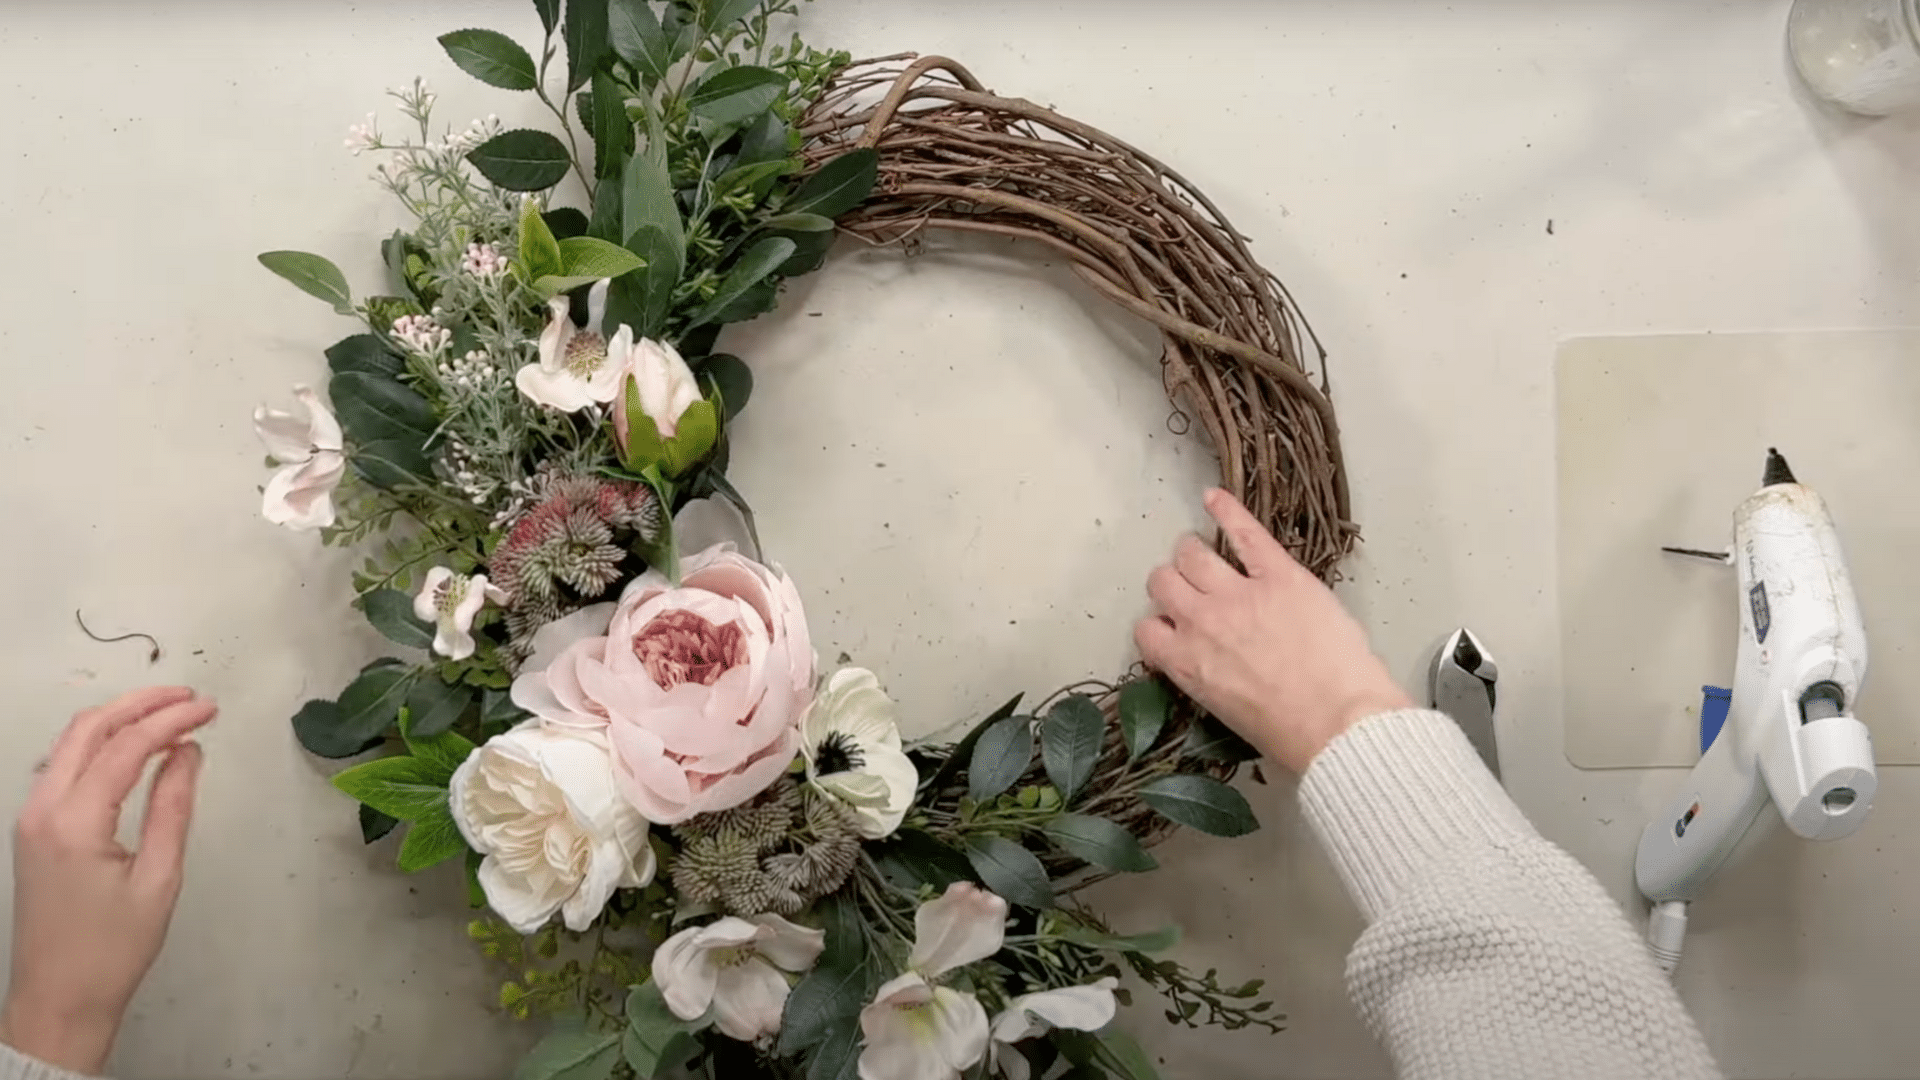
Once all elements are in place, reinforce any loose pieces with additional hot glue. Check the back to ensure no stems are sticking out.
Finally, fluff and adjust the flowers to give your wreath a full, lush appearance.
Looking for More Understanding? Check out This Video
Pro Tips for A Professional Look When Making a Wreath with Fake Flowers
1. Invest in Quality Artificial Flowers
I always spend more on higher-quality fake flowers with realistic textures, natural-looking stems, and varied petal formations.
The difference between budget and premium artificial blooms is immediately noticeable in the finished wreath.
2. Mix Different Flower Varieties and Sizes
Professional wreaths rarely feature just one type of flower.
I combine statement blooms (like peonies or roses) with smaller accent flowers, various greenery textures, and fillers like berries or seed pods for a layered, organized look.
3. Bend and Shape Your Flowers
Straight-from-the-package artificial flowers look artificial! I gently bend petals open, fluff centers, and curve stems to create natural variations.
This simple step makes fake flowers look significantly more realistic.
4. Create Depth with Strategic Placement
I position larger blooms first, then tuck smaller elements underneath and around them.
Some flowers face forward, while others angle slightly to the sides, creating dimension rather than a flat arrangement.
5. Balance Your Color Distribution
I ensure colors appear throughout the wreath rather than clustering all similar colors in one spot. This creates a harmonious flow that guides the eye around the entire design.
6. Hide Mechanical Elements
I carefully tuck in glue spots and trim visible wire ends.
Adding extra greenery to cover attachment points helps maintain the illusion of a naturally assembled wreath.
Common Mistakes & How to Avoid Them
Even though making a DIY floral wreath is fun and easy, a few common mistakes can make it look unbalanced or less professional. Here are what to watch out for—and how to fix them!
1. Overloading or Underfilling the Wreath
- Mistake: Using too many flowers can make the wreath look cluttered, while too few can leave it sparse and unfinished.
- How to Fix It: Start with a rough layout before gluing anything. Step back and check the balance—there should be a mix of florals, greenery, and visible wreath basBalanceesired).
2. Choosing the Wrong Wreath Base
- Mistake: Not all bases work with every design. A wireframe may not support heavier flowers, and a grapevine wreath may not hold stems securely without glue.
- How to Fix It: Pick a base that complements your flower type—wwireframesfor lightweight, structured designs and grapevine or foam bases for fuller arrangements.
3. Not Securing Flowers Properly
- Mistake: Flowers falling off or shifting after a while due to weak attachment.
- How to Fix It: Use hot glue, floral wire, or zip ties to ficure each stem. firmlyIf you’re ing a grapevine base, weave the ems into the branches before adding glue.
4. Ignoring Color & Texture Balance
- Mistake: Placing similar-colored flowers too close together or using only one texture makes the wreath look flat.
- How to Fix It: Alternate light and dark shades and mix different flower sizes and textures to create depth and dimension.
5. Forgetting to Fluff & Shape the Flowers
- Mistake: Not adjusting artificial flowers, leaving them stiff or unnatural-looking.
- How to Fix It: Before attaching, gently bend, fluff, and shape petals and leaves to make them look more natural and lifelike.
6. Poor Hanging Placement
- Mistake: The wreath tilts or doesn’t sit well when hung.
- How to Fix It: Ensure the heaviest elements are evenly distributed, and use a strong hanger or ribbon to keep it centered on your door or wall.
7. Not Considering Seasonal Updates
- Mistake: Using flowers that don’t match the season, making the wreath look out of place.
- How to Fix It: Design a base wreath with interchangeable elements—add spring florals in March, fall leaves in October, and festive touches in December!
Conclusion
Creating your budget-friendly wreath with artificial flowers is economical and allows you to express your style while crafting something truly lasting.
With the steps outlined, you have everything needed to make a professional-looking wreath that will brighten your home for years.
Why not set aside an afternoon this weekend to create your masterpiece?
Once finished, we’d love to see your creation—share a photo in the comments below!