Ever walked into Dollar Tree and wondered what magical creation you could make with just a few simple items? Well, I did! And let me tell you, this egg wreath is seriously the cutest spring decoration I've made in years, and it cost me less than $15 total. I'm all about crafting on a budget, …

Ever walked into Dollar Tree and wondered what magical creation you could make with just a few simple items?
Well, I did! And let me tell you, this egg wreath is seriously the cutest spring decoration I’ve made in years, and it cost me less than $15 total.
I’m all about crafting on a budget, but this project looks like I spent way more than I actually did. The best part? You don’t need any special crafting skills to make this happen. Just grab your supplies, pour yourself something refreshing, and follow along.
I’ll walk you through every step so you can create this gorgeous wreath for your spring décor too!
Understanding the Significance of Egg Wreaths
Let’s talk about why egg wreaths are so special!
I’ve always been drawn to them because eggs symbolize new beginnings and rebirth, which is exactly what spring is all about. In many cultures around the world, decorative eggs have been part of spring celebrations for centuries.
What I love most about making egg wreaths is how versatile they are. You can hang them on your front door to welcome guests, use them as a centerpiece for your Easter dinner table, or even display them on a wall as part of a spring gallery.
And the best part? They work from early March all the way through May, giving you plenty of decorating mileage for your crafting efforts.
Not to mention, there’s something so cheerful about their colorful appearance that instantly brightens up any space. I’ve found that whenever I hang mine up, it immediately puts me in a springtime mood, no matter what the weather is doing outside!
Dollar Tree Supplies Needed to Create Egg Wreath
| Category | Items Required |
|---|---|
| Base | Egg-shaped wire wreath form (Dollar Tree) |
| Yarn | Chunky pink chenille yarn (Walmart or similar) |
| Ribbon | Two different Easter-themed ribbons (2.5 inches wide, 3 yards each) |
| Glue | Hot glue gun with glue sticks + Aileen’s Tacky Glue |
| Scissors | Sharp scissors for cutting yarn and ribbon |
| Decorations | Wooden Easter-themed words (“Easter” and “Bunny”) |
| Paint | FolkArt Vintage White acrylic paint |
| Brushes | Small craft paintbrush for painting wooden words |
| Bunny Accent | Wooden bunny cutout (Dollar Tree) + small cotton ball for the tail |
| Hanger | Piece of jute ribbon (from the original Dollar Tree sign) |
How to Create a Dollar Tree Egg Wreath at Home
Follow these seven simple steps to craft a lasting dollar tree egg wreath.
Step 1: Prepare and Wrap the Wreath Form
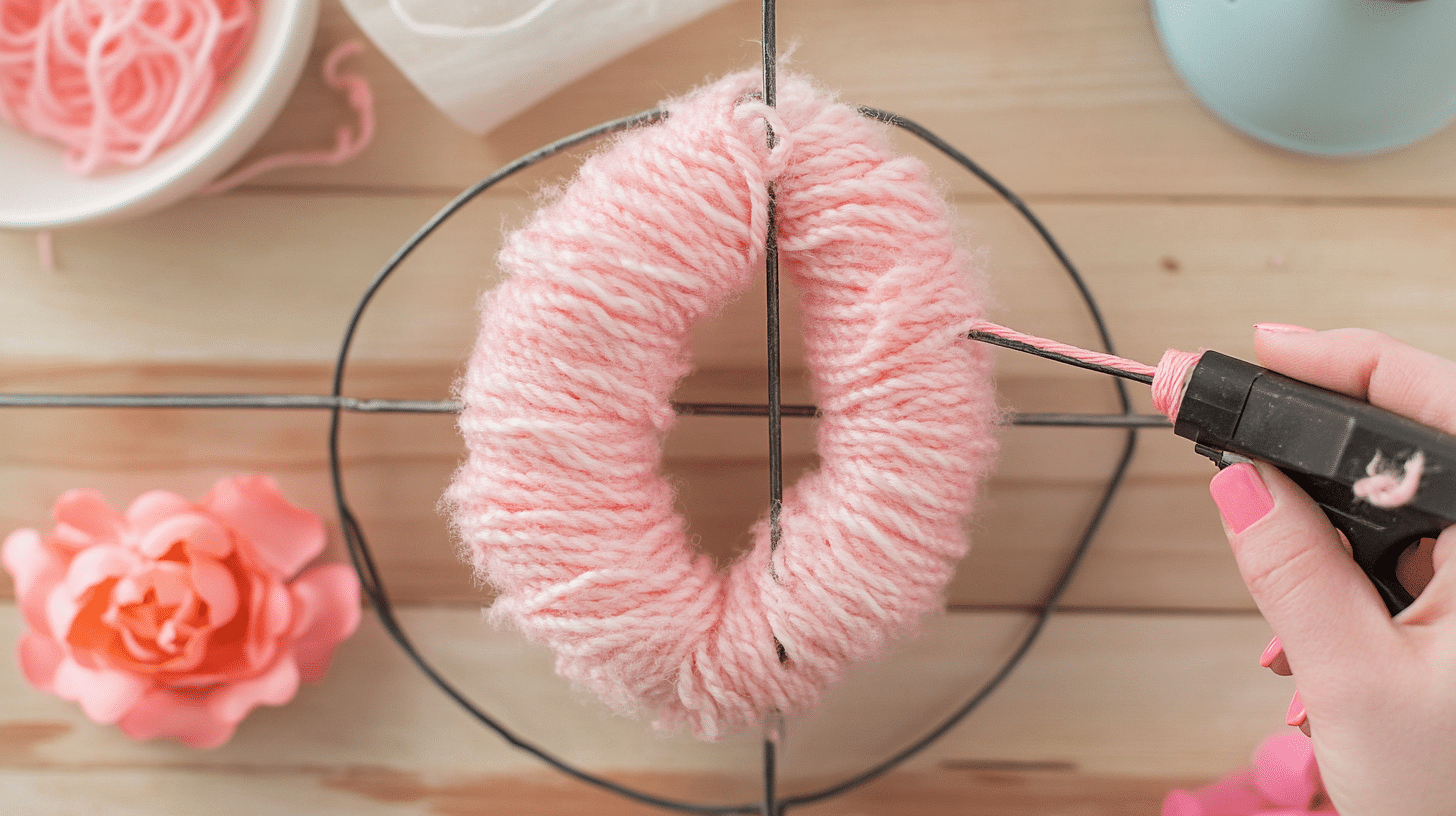
- Cut a manageable length of chunky pink chenille yarn to make wrapping easier.
- Secure one end of the yarn to the inner two bars of the wreath form using hot glue.
- Wrap the yarn around the two bars, ensuring full coverage.
- If needed, apply small dabs of hot glue along the way to keep it from slipping.
- Continue wrapping until the inner section is completely covered, then trim and glue the end securely at a crossbar.
Step 2: Prepare the Ribbons
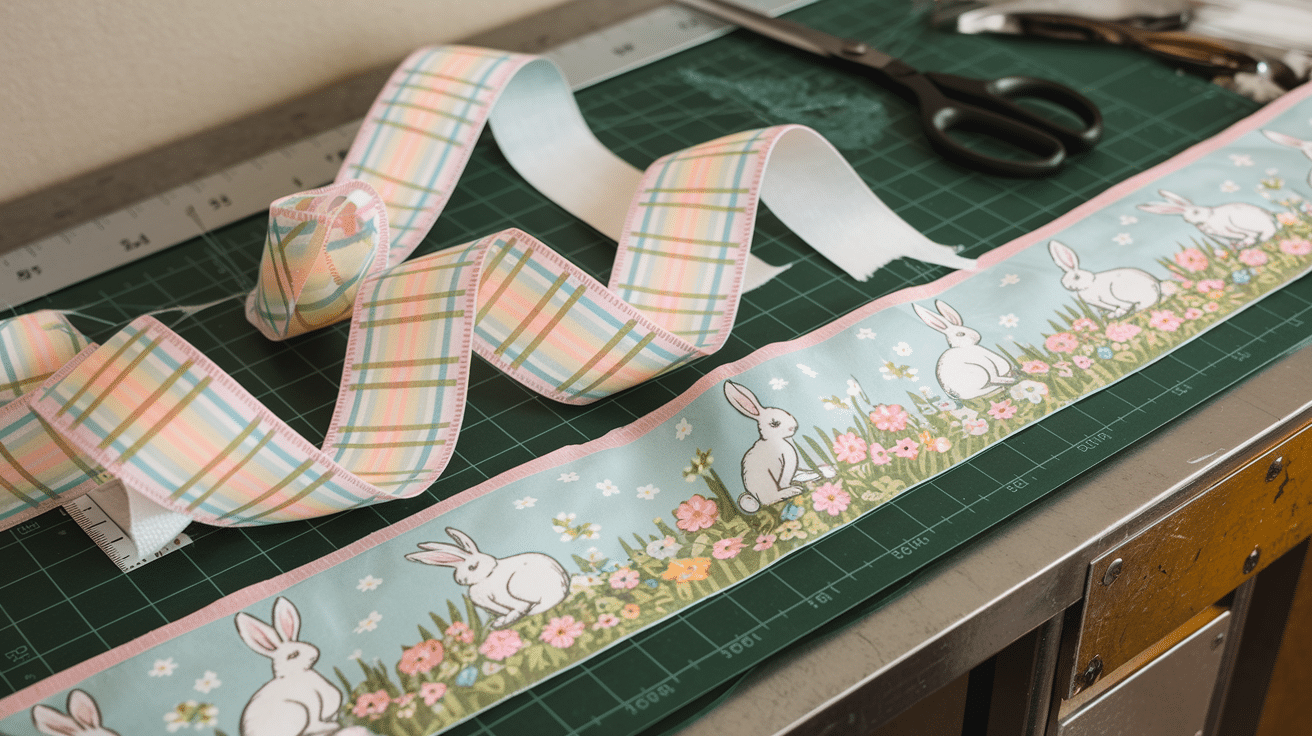
To give your wreath a layered and decorative touch, you’ll need two different Easter-themed ribbons.
First, choose two colors or patterns that complement the soft pink yarn. You’ll want ribbons that are 2.5 inches wide and at least 3 yards long.
Once you’ve selected your ribbons, cut them into 6-inch strips.
To create a polished and professional look, dovetail the ends of each ribbon strip. To do this, fold the strip in half lengthwise and make a diagonal cut from the fold to the outer edge. This will give your ribbon a V-shaped finish that looks neat and graceful on the wreath.
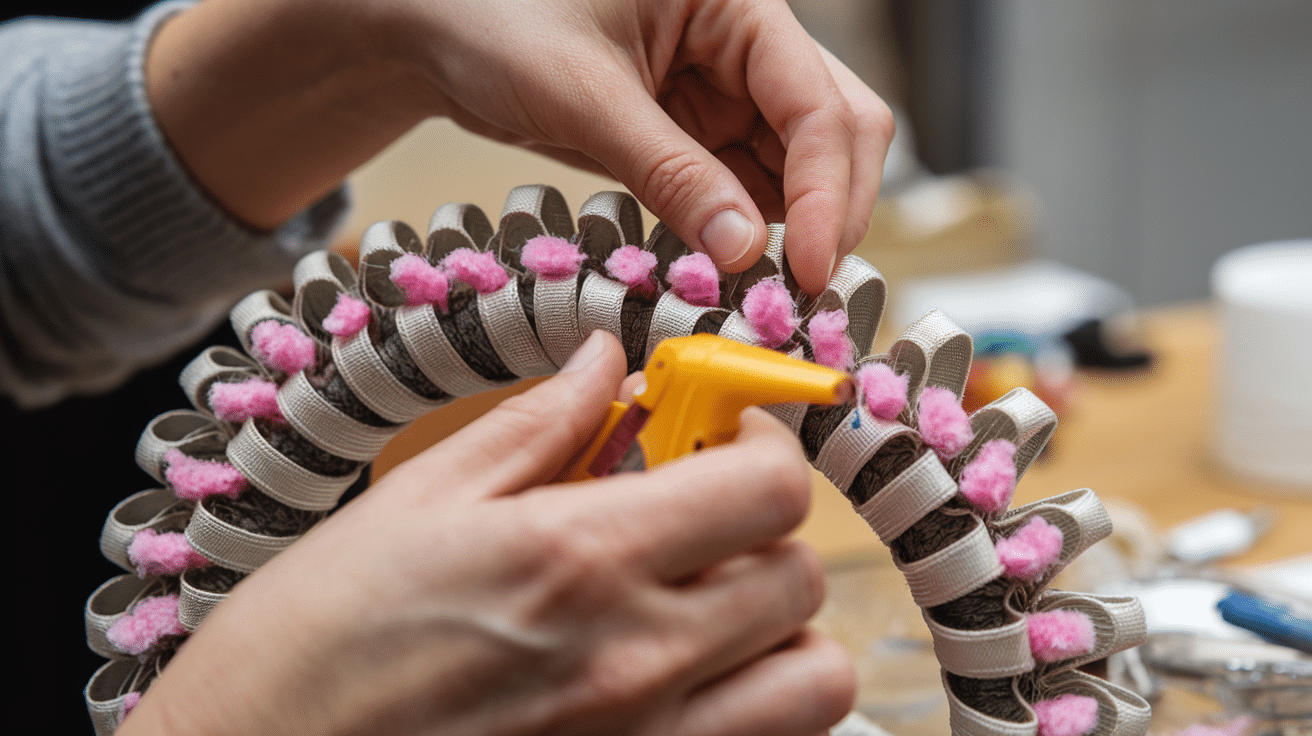
Step 3: Attach the Inner Ribbon Layer
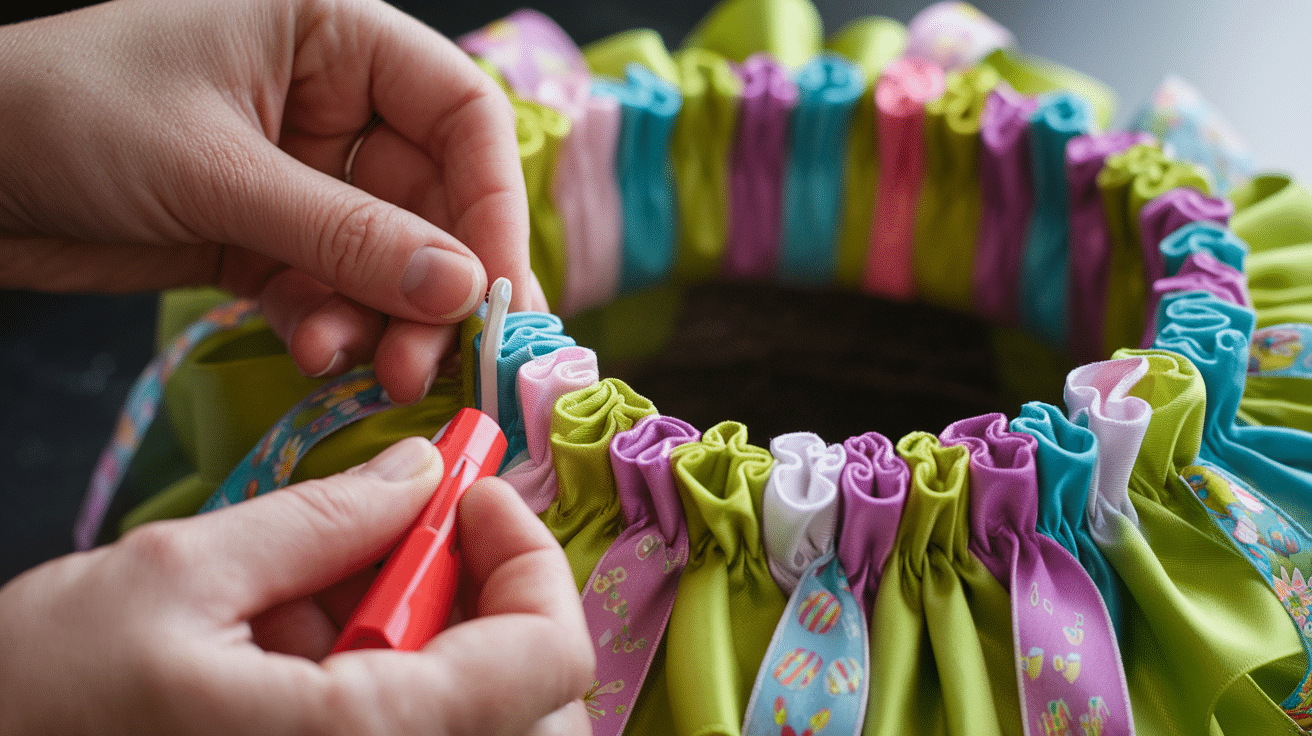
This step will create the first layer of decorative ribbon on your wreath, adding depth and texture.
- Take your first ribbon (e.g., bunny print or any Easter-themed design).
- Loop one strip around the inner bar of the wreath so that both ends meet at the base.
- Apply a small dab of hot glue in the center, then pinch the base of the ribbon together to create a scrunched effect.
- Hold the ribbon in place for a few seconds to let the glue set.
- Repeat this process, placing each ribbon approximately one inch apart. If you prefer a fuller look, you can space them even closer together.
- Continue attaching ribbon pieces all the way around the inner bar until it’s completely covered.
Pro Tip: If you want a denser, more luxurious look, you can overlap the ribbons slightly as you glue them.
Step 4: Cover Any Gaps
If small gaps appear between the wrapped yarn and ribbon, flip the wreath over. Then apply a small amount of hot glue and attach another strip of chenille yarn to the back.
This will ensure a seamless, professional look from the front while keeping the back neat.
Step 5: Attach the Outer Ribbon Layer
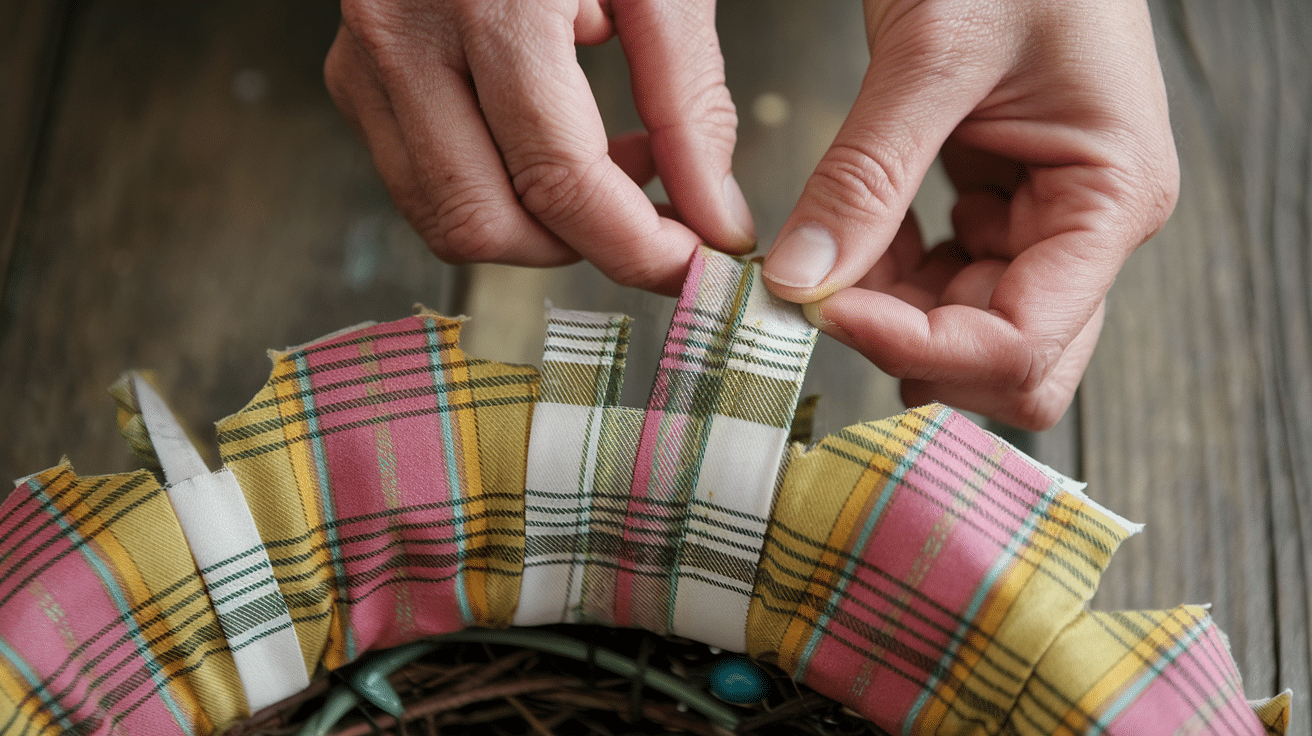
Taking the second ribbon (e.g., plaid print) and follow the same process as the inner ribbon layer.
Next, adjust how much of the ribbon peeks out by making the top part slightly longer than the bottom when securing it. Continue all the way around until you achieve a balanced and layered ribbon effect.
Step 6: Add the Decorative Elements
Now it’s time to give your wreath some personality with festive embellishments!
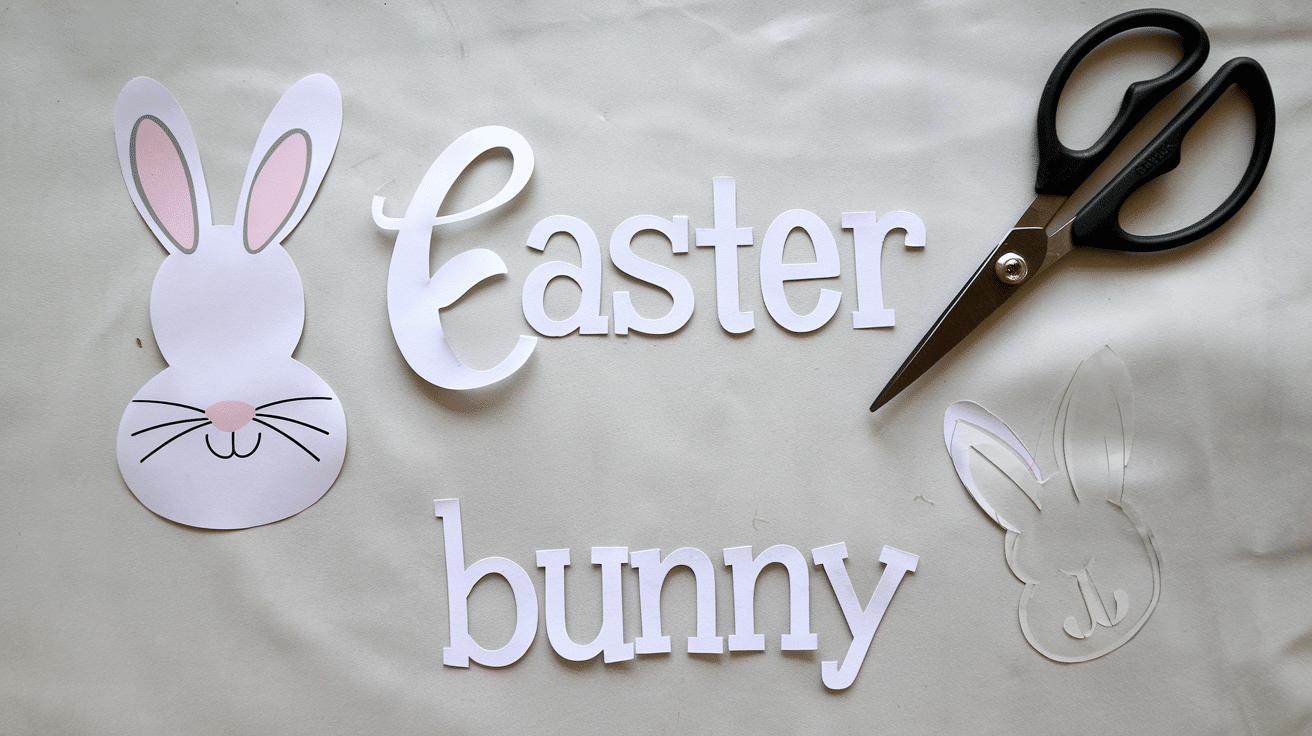
Paint the Wooden Words:
- Using FolkArt Vintage White acrylic paint, apply a smooth coat to the wooden “Easter” and “Bunny” words.
- Let them dry completely before handling to avoid smudges.
- You can also lightly distress the edges with a sanding block for a rustic, farmhouse look.
Prepare the Bunny Accent: To prepare the bunny accent, start by selecting a wooden bunny cutout, which can be found at Dollar Tree.
If your cutout has a natural wood finish, you can either leave it as is for a rustic look or paint it to match your wreath’s color scheme. For an added touch of charm, take a small cotton ball and use hot glue to attach it to the bunny’s tail. This simple addition creates a fluffy, 3D effect that enhances the cuteness of your design.
Position and Attach the Decorations:
- Place the bunny slightly below the center of the wreath.
- Arrange the “Easter” word at the top and “Bunny” at the bottom.
- Use a combination of Aileen’s Tacky Glue and hot glue—the hot glue will provide instant hold, while the tacky glue ensures long-term durability, even in outdoor conditions.
- Hold each piece in place for a few seconds to ensure a secure bond.
Once your decorations are attached, take a step back and check the placement. Make any final adjustments before moving on to the last step!
Step 7: Create the Hanger and Final Touches
To make your wreath easy to hang, take a piece of jute ribbon (you can reuse the one that came with the Dollar Tree sign) and cut it to the desired length. Flip your wreath over and secure each end of the ribbon to the back, slightly off-center, with hot glue. This will ensure that when you hang the wreath, it stays balanced and level.
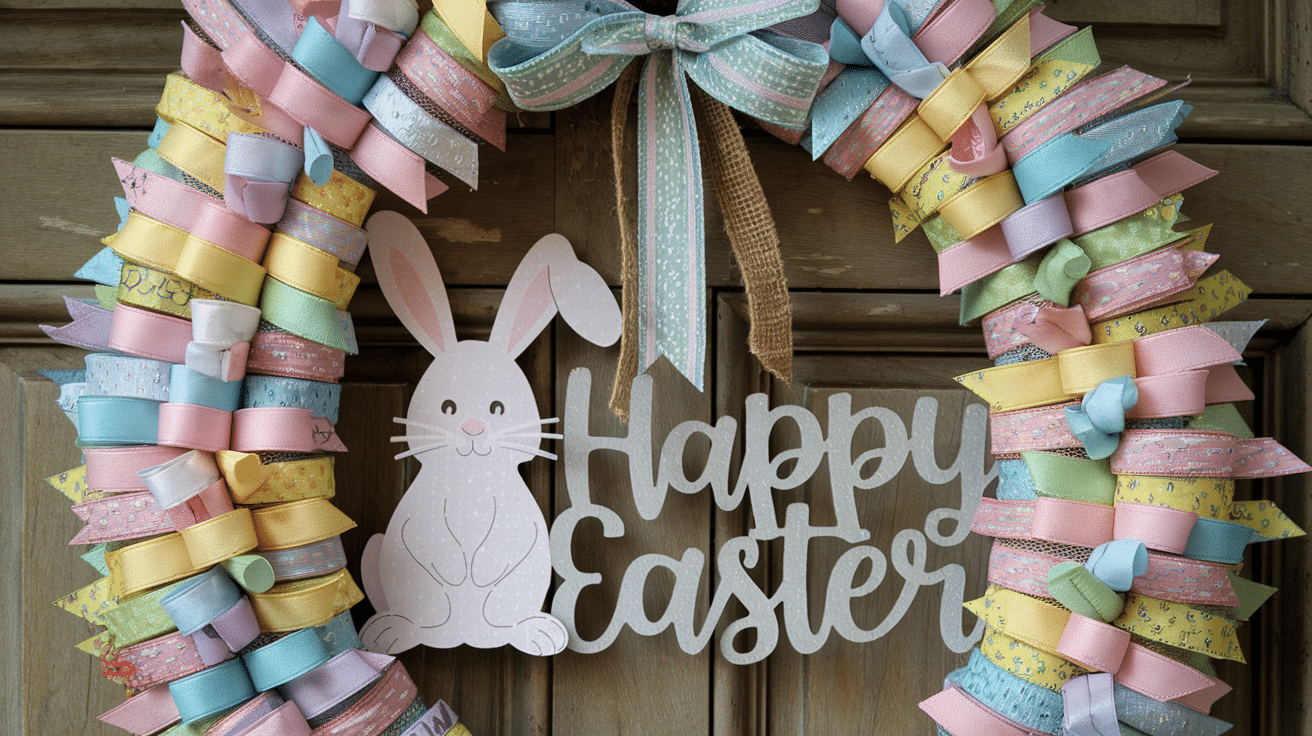
Once all the glue has fully dried—especially the tacky glue, which takes 24 hours to set completely—your wreath is ready to be displayed!
Whether you hang it on your front door, a wall, or a mantel, it will bring a festive, cheerful touch to your Easter décor.
Enjoy your handmade Easter wreath!
For a more detailed tutorial on how to craft a dollar tree egg wreath at home, check out the video below:
Dollar Tree Egg Wreath Designs to Try
I’ve experimented with so many different egg wreath designs over the years, and the best part is that Dollar Tree has everything you need to make these beauties without breaking the bank!
Here are a few of my favorite designs that you can easily recreate:
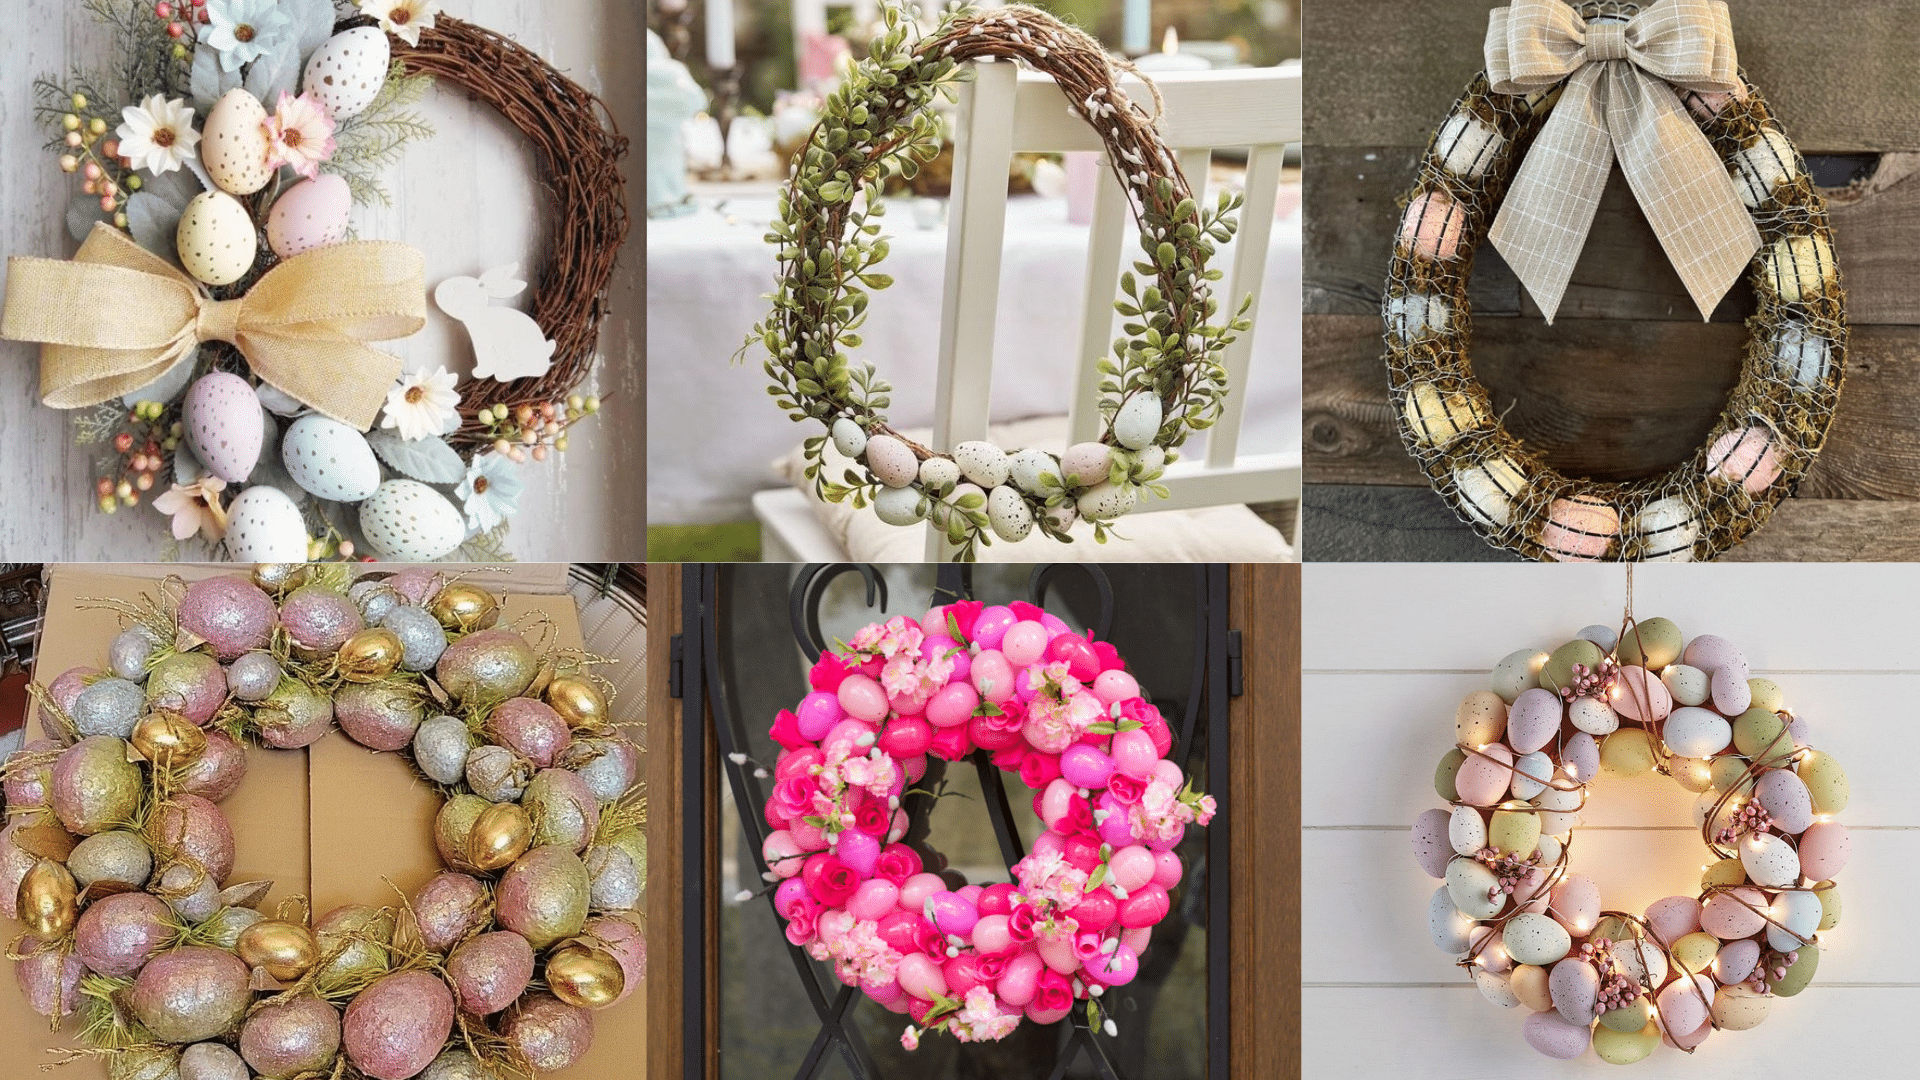
1. Classic Pastel Egg Wreath
This is my go-to design because it’s simple but stunning.
I use a mix of pastel-colored plastic eggs from Dollar Tree (they usually come in packs of 12-16), and arrange them in a color pattern around a simple grapevine wreath. I like to add a few sprigs of Dollar Tree greenery and maybe a small ribbon bow at the bottom.
The whole thing costs less than $10 and takes about 30 minutes to make!
2. Rustic Farmhouse Egg Wreath
For this one, I grab those same plastic eggs but give them a quick makeover with some chalky paint (also available at Dollar Tree sometimes, or just use regular craft paint mixed with a bit of baking soda).
I stick to whites, creams, and maybe a soft sage green. Then I hot glue them onto a Dollar Tree wire wreath form that I’ve wrapped with their jute twine. Add a burlap bow and some dried baby’s breath, and you’ve got yourself a farmhouse-style wreath that looks like it came straight from a boutique.
3. Glam Metallic Egg Wreath
When I’m feeling a bit fancy, I spray paint Dollar Tree plastic eggs in metallic gold, rose gold, and silver.
After they dry, I attach them to a foam wreath form using hot glue.
For extra pizzazz, I tuck in some Dollar Tree pearl picks between the eggs. It’s a modern take on the traditional egg wreath and looks way more expensive than it actually is.
4. Ombré Effect Egg Wreath
This is such a fun one!
I buy several packs of white plastic eggs and then use Dollar Tree craft paint to create an ombré effect—going from light to dark in the same color family (like light pink to deep magenta, or pale blue to navy). I arrange them in a gradient around a foam wreath form, and the result is absolutely eye-catching.
I’ve had neighbors stop to ask where I bought it!
Remember, these are just starting points. The beauty of making these wreaths is that you can mix and match elements, add your own personal touches, and create something that perfectly matches your style.
And trust me, once you make one, you’ll be hooked on creating more.
How to Preserve Your Dollar Tree Egg Wreath
After putting all that work into creating your gorgeous egg wreath, you definitely want it to last.
I learned this the hard way when my first wreath faded badly after just one season. Now I’ve got some tried-and-true tips to help your Dollar Tree masterpiece stay beautiful year after year.
- Indoor vs. Outdoor Display:
Let’s be real—those plastic Dollar Tree eggs aren’t made for harsh weather.
I’ve found that my wreaths last so much longer when I hang them indoors or in protected areas like a covered porch. If you really want to display yours on an exposed front door, try to position it where it won’t get direct sunlight or be pummeled by rain.
And honestly, I just bring mine inside when severe weather is forecasted. Better safe than sorry!
- Sun Protection:
The biggest enemy of your egg wreath is actually the sun. Those UV rays will fade those pretty colors faster than you can say “spring has sprung.”
If your wreath gets any sun exposure, spray it with a clear UV-resistant sealer (I’ve used Krylon’s clear acrylic coating with good results). For wreaths with painted eggs, this step is absolutely essential—trust me on this one.
- Dust Control:
It might sound silly, but dust is another silent wreath killer.
Every few weeks during display season, I take mine down and give it a gentle once-over with a clean, soft paintbrush. For really stubborn dust, a quick blast with canned air (the kind used for keyboards) works wonders without disturbing your arrangement.
- Proper Storage:
When spring is over, proper storage makes all the difference.
I wrap my wreaths loosely in acid-free tissue paper, then place them in a plastic storage bin with a tight-fitting lid. Never use regular plastic bags—they trap moisture and can lead to mildew.
And whatever you do, don’t stack heavy items on top of your wreath! I learned that lesson when I found my beautiful creation squished flat the following year.
- Quick Repairs:
Despite your best efforts, eggs might occasionally pop off or decorative elements might shift. I keep a small “wreath emergency kit” with my seasonal decorations—just a mini hot glue gun, extra glue sticks, and a few spare eggs and embellishments. This way, I can make quick repairs without having to hunt down materials again.
- Refreshing Your Design:
Sometimes preservation isn’t just about keeping it intact but keeping it fresh!
Every other year or so, I like to give my wreaths a little makeover. I’ll add new ribbon, switch out some decorative elements, or even repaint a few eggs for a different look. It’s much easier than starting from scratch, and it gives new life to your creation.
Wrapping It Up!
There you have it, my fellow crafters.
Creating these egg wreaths isn’t just about saving money—it’s about expressing yourself through seasonal décor that brings joy to your home. I hope you’ll take these designs and make them your own. Maybe add unexpected elements or try color combinations I haven’t thought of yet. And don’t forget to share your creations online!
Remember, crafting should be fun, not stressful. If your wreath doesn’t turn out exactly as planned, that’s okay. Each “mistake” is just a creative detour.
So grab those Dollar Tree supplies and start creating—your perfect spring wreath is waiting to happen!