Need a simple way to organize your garden? I've been there—staring at rows of similar seedlings, trying to remember what I planted where. It's frustrating when those plastic store-bought markers crack after one season or when written labels wash away with the first rain. But here's something you might not know: clay markers made at …

Need a simple way to organize your garden?
I’ve been there—staring at rows of similar seedlings, trying to remember what I planted where.
It’s frustrating when those plastic store-bought markers crack after one season or when written labels wash away with the first rain. But here’s something you might not know: clay markers made at home can last for years and add a charming, personal touch to your garden beds.
I found this budget-friendly solution during a particularly chaotic growing season, and it completely transformed how I keep track of my plants.
In this guide, I’ll show you exactly how to create these durable clay garden markers using materials you probably already have around your house.
Clay Garden Markers: Beyond Basic Labeling
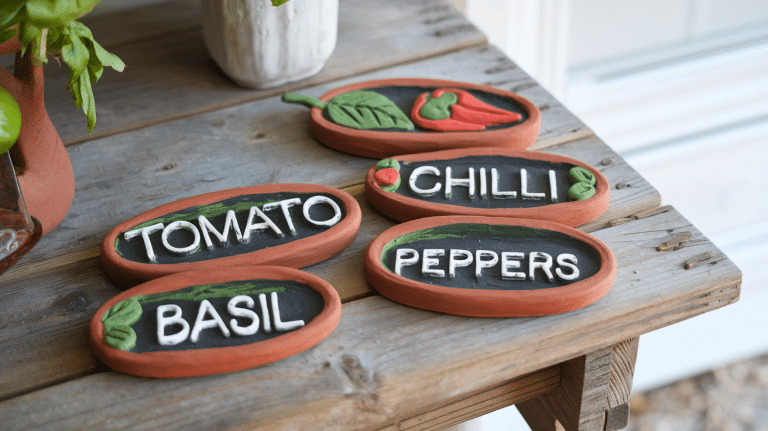
Clay garden markers are handcrafted identification tags made from natural clay or polymer clay. Which are further, shaped , stamped or inscribed with plant names, and then bake until hardened.
I’ve found these markers incredibly versatile in my garden.
I use them primarily to identify different herbs, vegetables, and flowers, which prevents confusion when plants are just emerging and look similar.
They’re perfect for marking seed rows in vegetable gardens, identifying different varieties of the same plant (like my four types of tomatoes), and labeling perennials that disappear in winter.
I also use them to record planting dates by pressing numbers into the clay.
What I love most is that, unlike plastic or wooden markers, my clay versions withstand harsh weather conditions, staying legible through rain, snow, and intense sun.
They’ve become permanent fixtures in my garden, adding both function and a personal artistic touch to my growing spaces.
Tools and Materials Required
| Tools | Materials |
|---|---|
| Rolling pin (or hands) | Polymer clay (white or black) |
| Pizza cutter (optional) | Archival ink pad (black preferred) |
| Stamps (alphabet set) | Wire (for stand-up markers) |
| Sharpie or paint pens | Parchment paper or cardstock |
| Baking sheet | Craft paint (optional) |
Estimated Budget: $40 – $80
Note: If you already have some of these materials (like a rolling pin, baking sheet, or sharpies), the cost will be much lower.
Simple Instructions for DIY Clay Markers
Creating your own clay markers is easier than you might think. I was surprised at how quickly I got the hang of it, even with zero artistic talent. These steps have worked consistently for me through several seasons of gardening.
Let me walk you through my foolproof process that turns simple clay into lasting garden companions.
Step 1- Warm Up the Clay
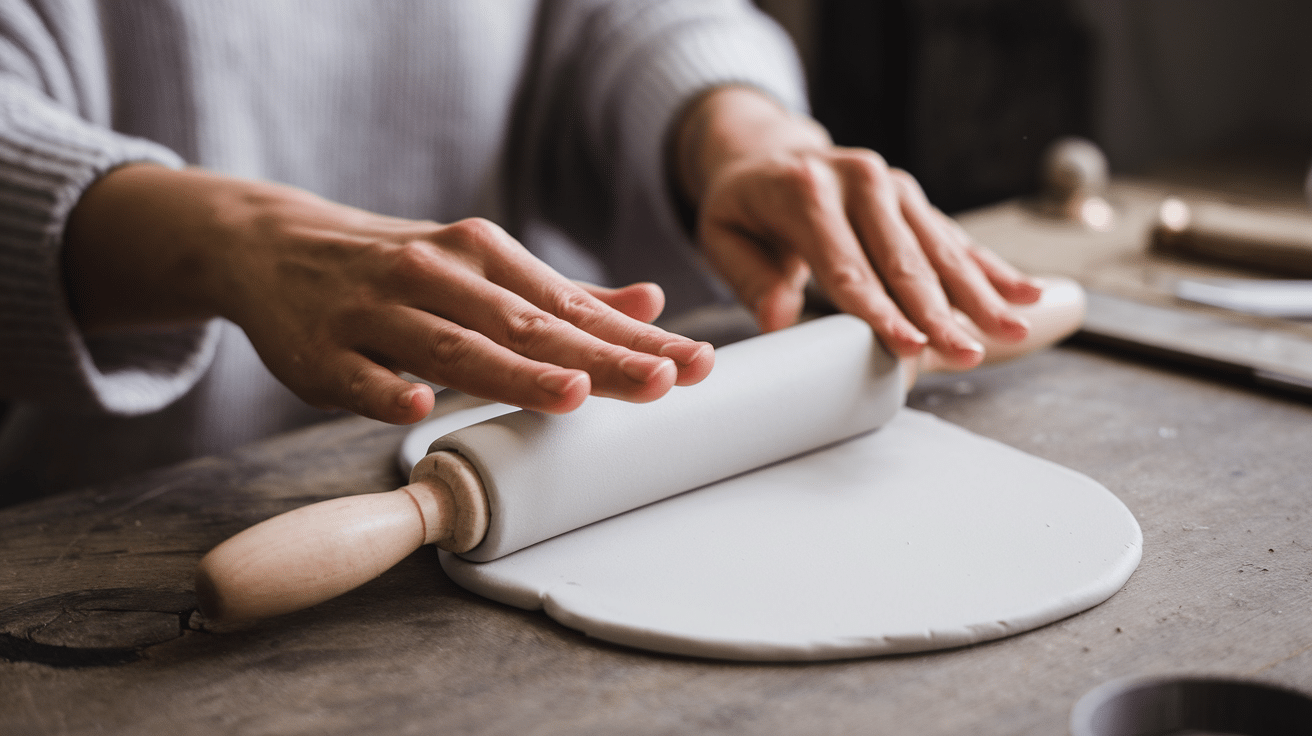
First things first—grab your polymer clay and soften it up by rolling it between your hands. This makes it much easier to shape and work with. If you’re using a rolling pin, lightly press the clay until it’s about ¼ inch thick.
No rolling pin? No problem—just use your hands to flatten it out.
Step 2- Shape the Markers
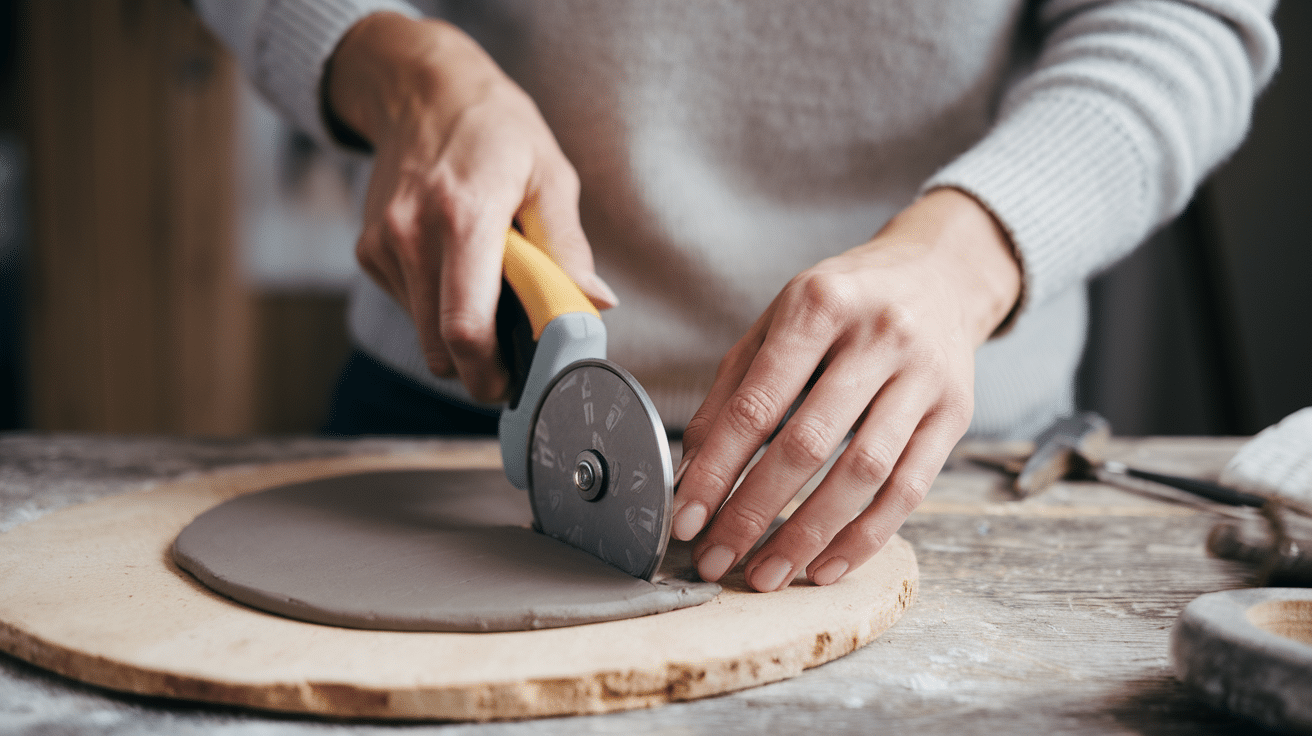
There are a couple of ways to shape your markers.
You can:
- Cut them out neatly using a pizza cutter for a smooth, uniform look.
- Go for a more handmade vibe by rolling and shaping them by hand. Either way, aim for pieces that are long enough to fit your plant names.
Step 3- Stamp the Names
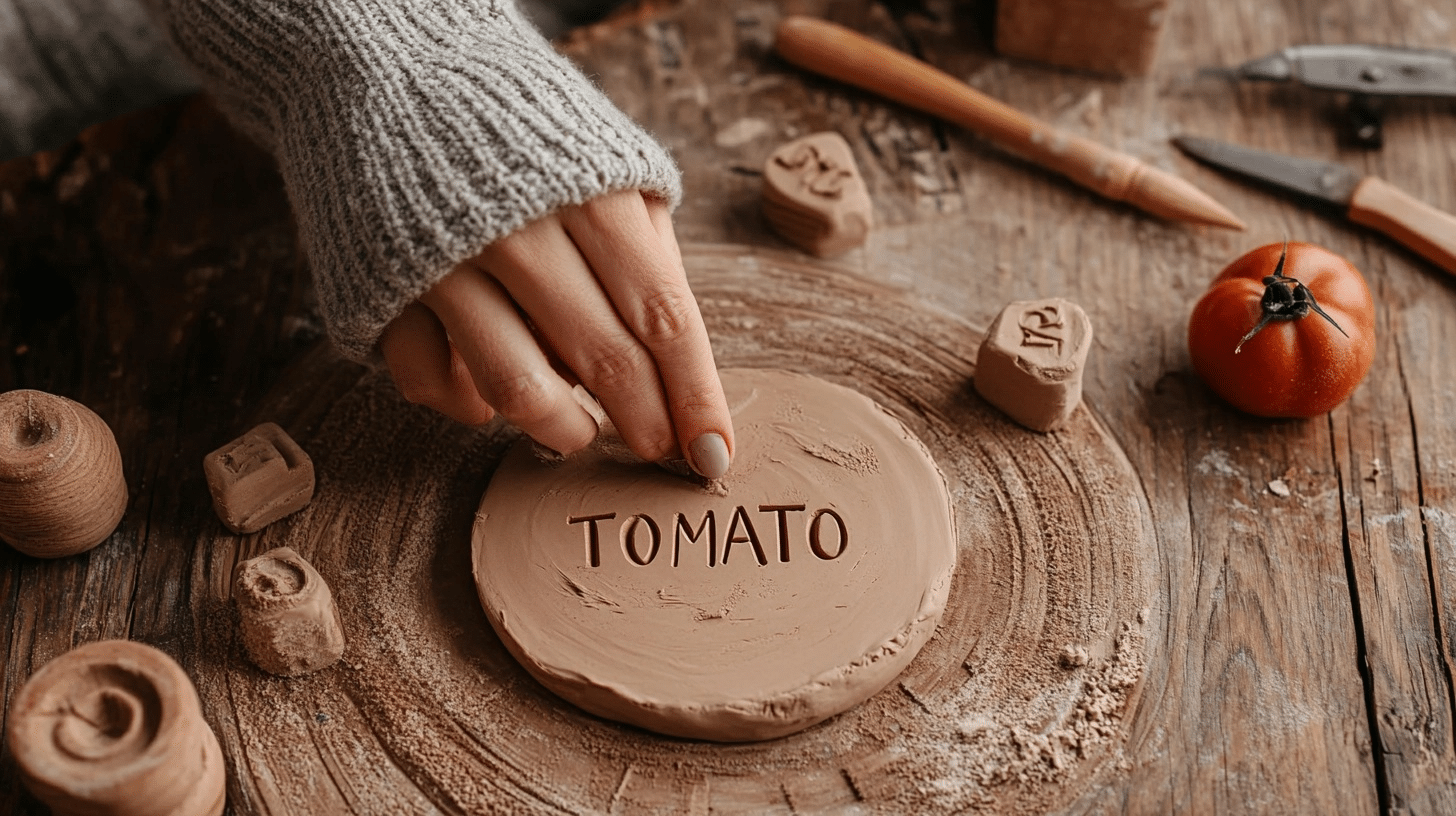
Time to add those plant names!
You’ve got options here:
- Use an ink pad for crisp, clear lettering.
- Go ink-free and press stamps directly into the clay for an embossed effect.
- Try a marker (like a metallic Sharpie) to fill in the letters after stamping. Be sure to blot the stamps on a paper towel between uses to keep things neat.
Step 4- Add the Wire (Optional)
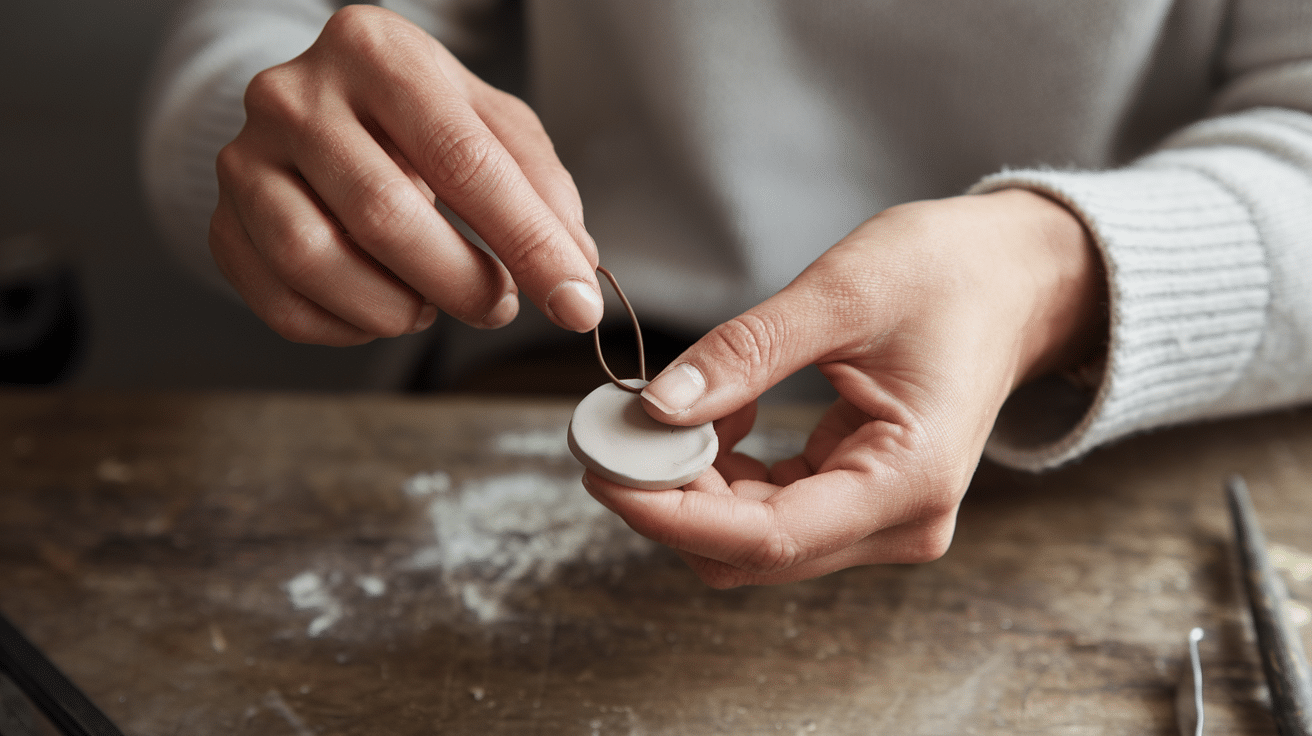
If you want stand-up markers, cut a piece of wire to your preferred length. Gently press it into the back of the clay piece, then pinch the clay around it to secure it in place.
This step ensures the wire stays put while baking.
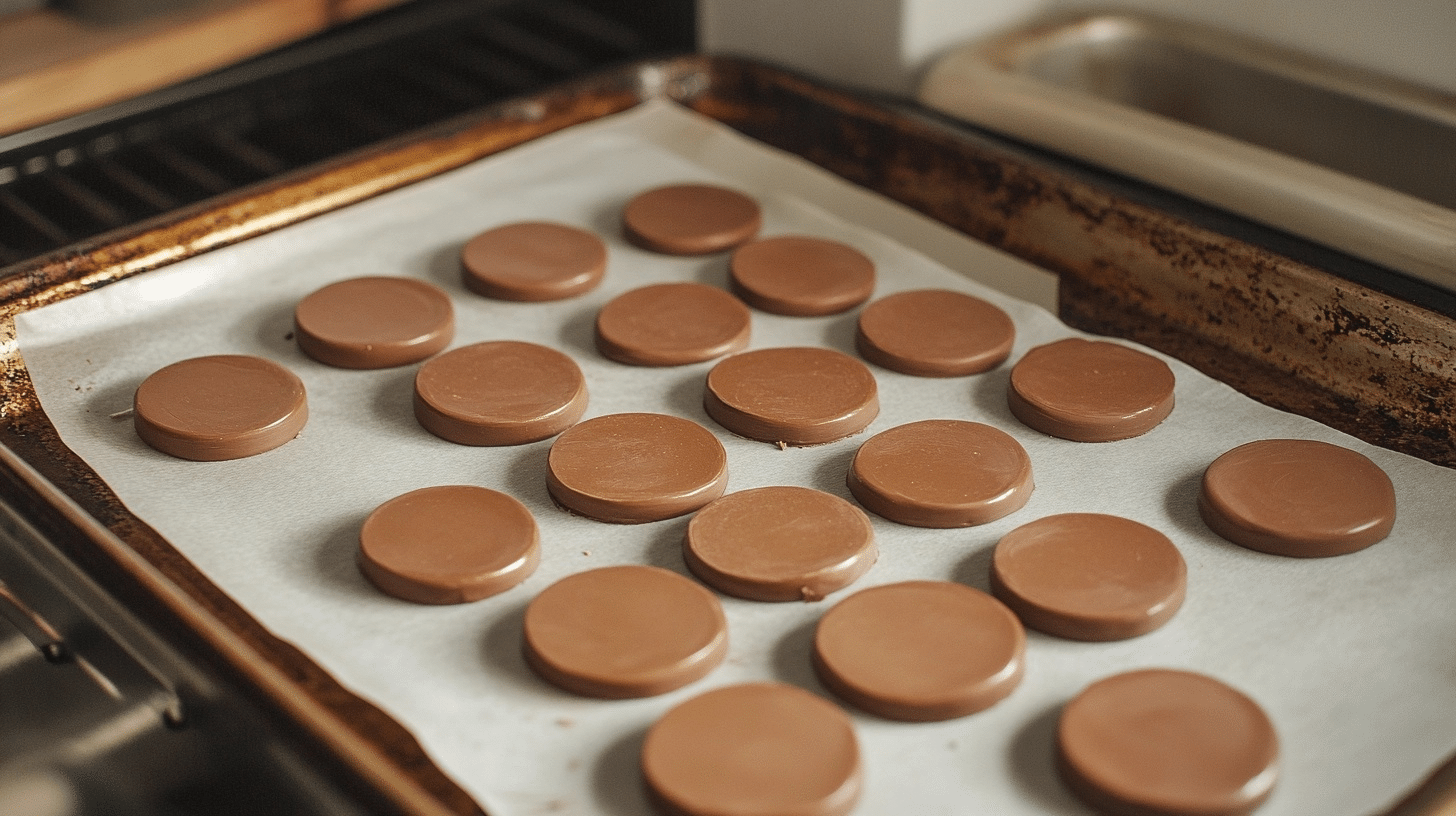
Step 5- Bake the Clay
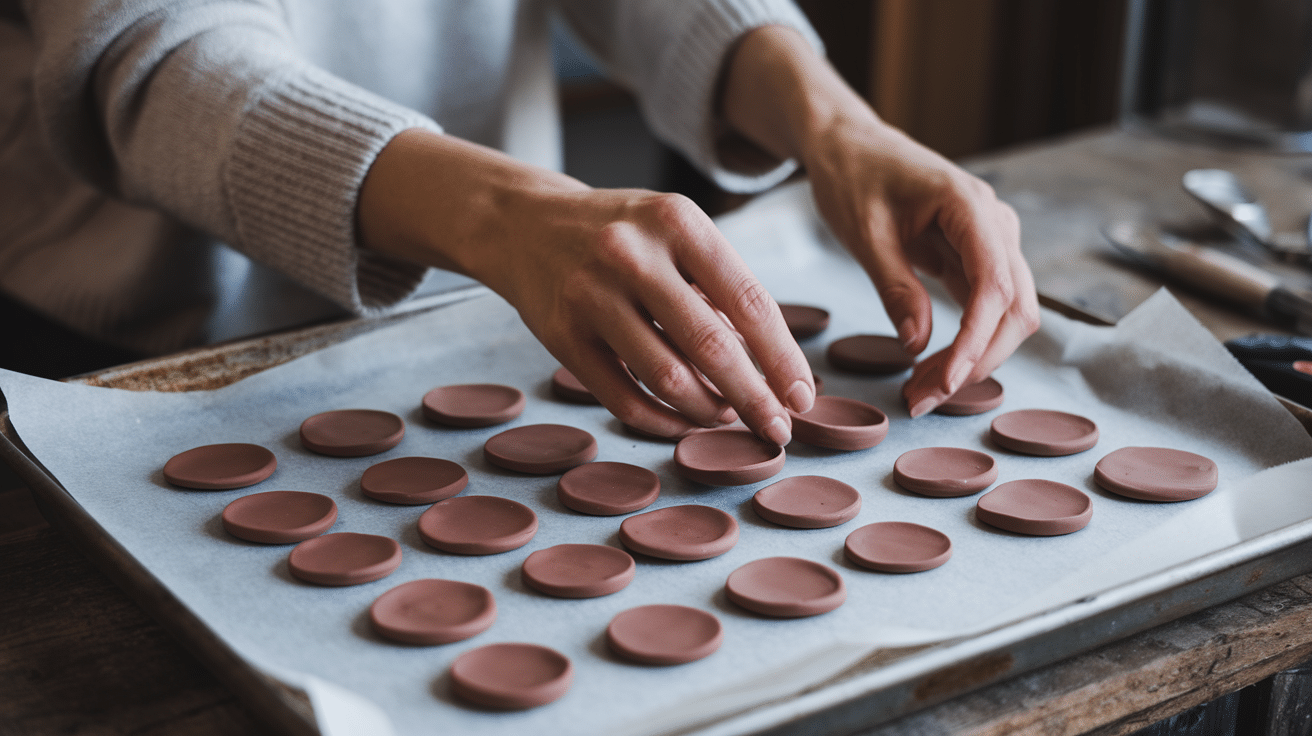
Place your clay markers on a baking sheet lined with parchment paper (or cardstock, if that’s all you have).
Bake them according to the instructions on your polymer clay packaging—usually around 275°F (135°C) for 30 minutes. Keep an eye on them to prevent overbaking.
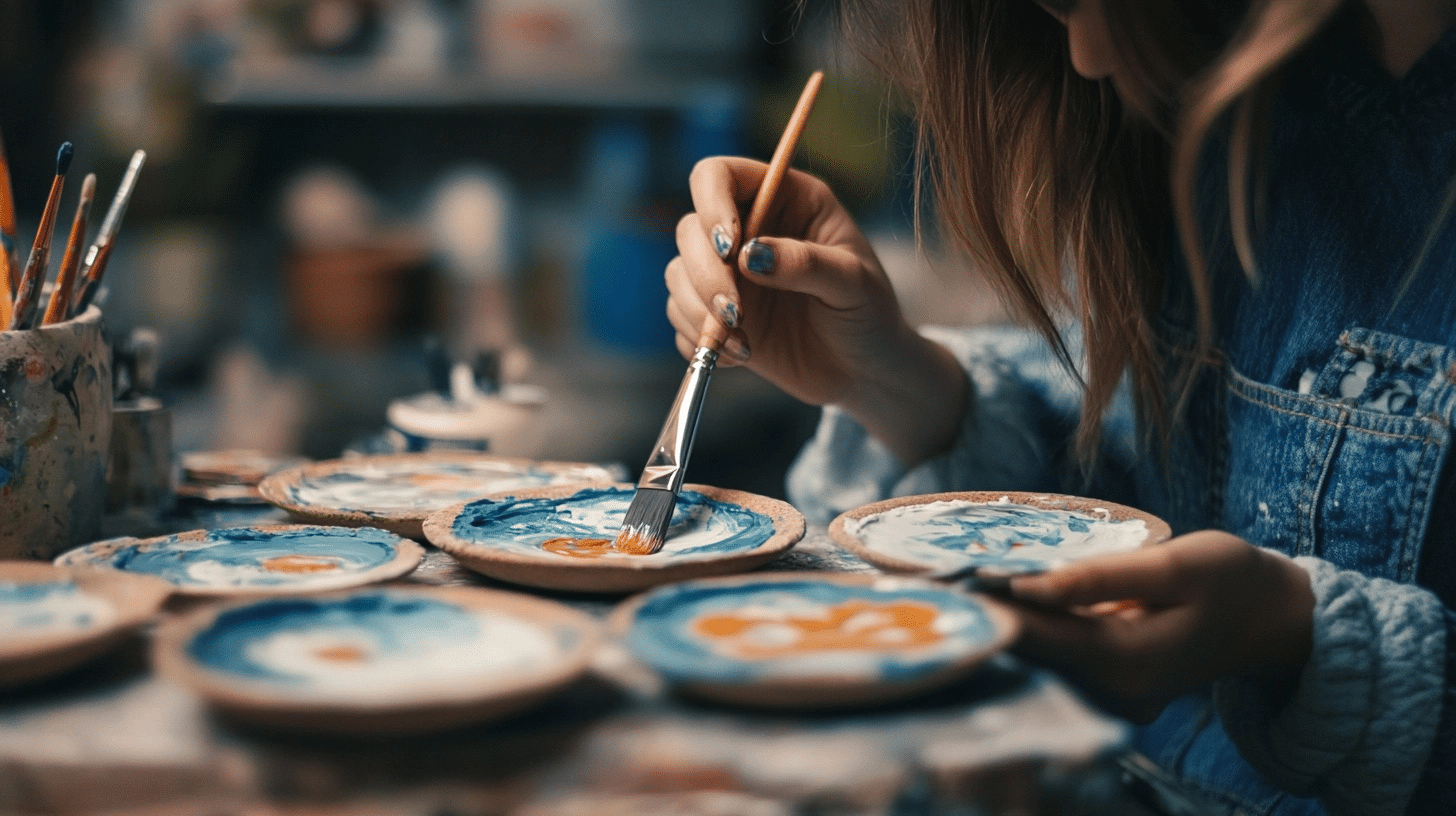
Step 6- Paint & Finish
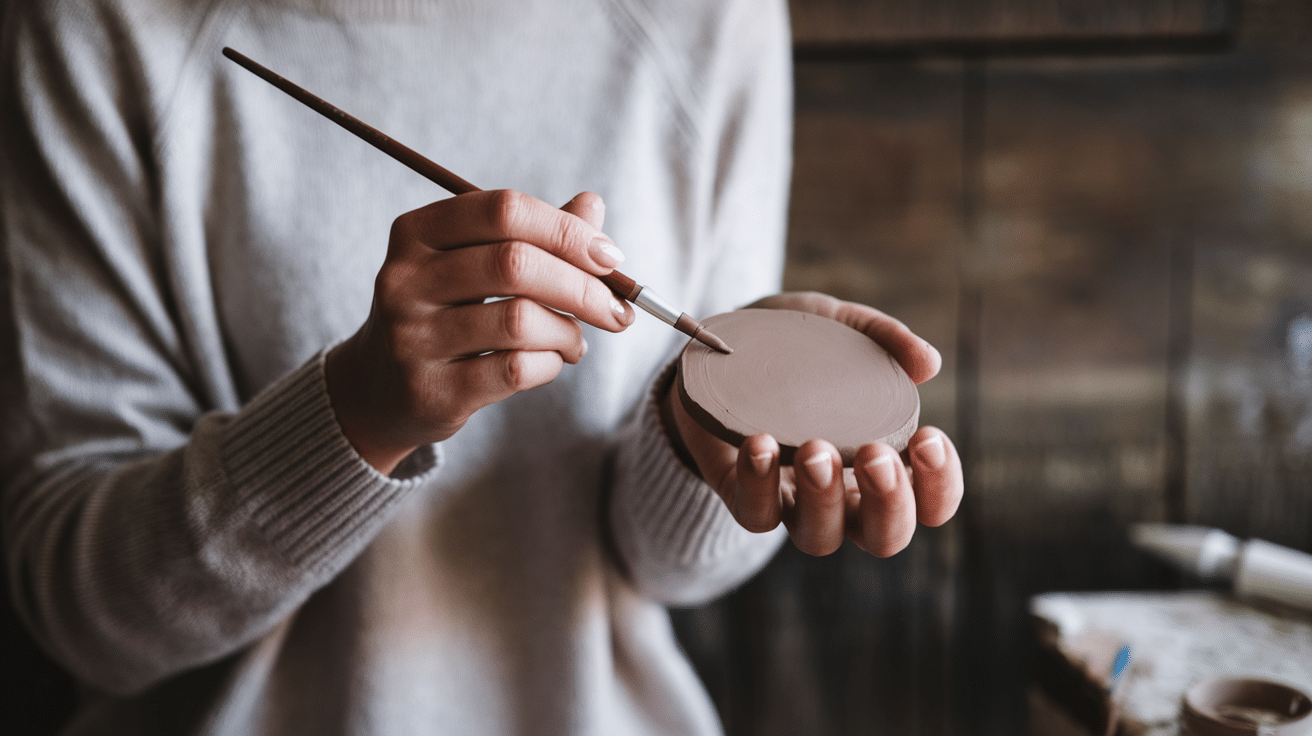
Once cooled, you can enhance the look by:
- Painting over stamped letters with craft paint.
- Using a Sharpie paint pen to write directly on the markers.
- Sealing them with a clear coat for extra durability (especially if they’ll be in a rainy garden).
Step 7- Stick ‘Em in Your Garden!
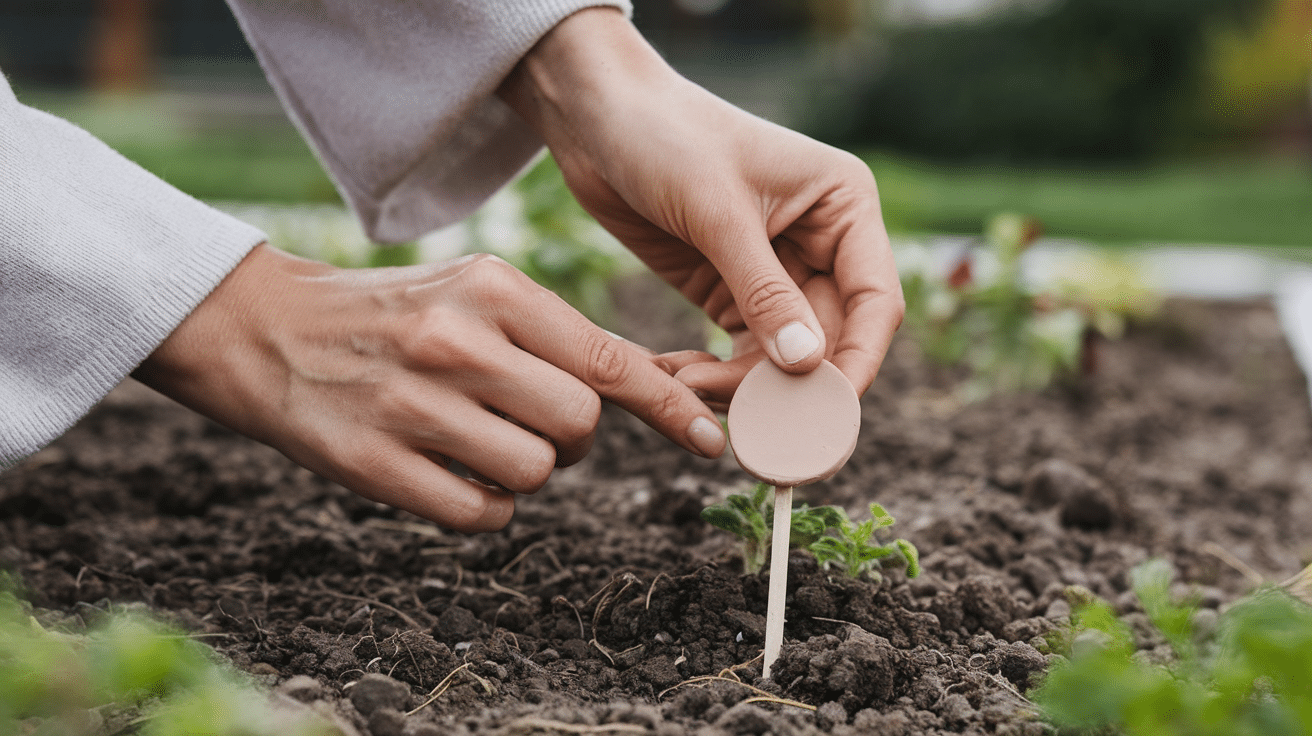
And just like that, your DIY garden markers are ready to shine!
Either you made simple stamped ones, wire-backed signs, or hand-lettered tags, they’ll add a touch of charm to your plants. Now, go plant something amazing and let these markers do their job.
For detailed instructions on crafting your personalized clay markers, check out the video given below:
Customizing My Clay Garden Markers
The beauty of making my own clay markers lies in the endless ways I can personalize them.
Instead of settling for generic store-bought options, I’ve experimented with different techniques to make markers that truly reflect my garden’s personality.
Each batch I create has its own unique character, making my garden not just organized but also visually appealing. Here are some of my top tips that you can follow too for adding a personal touch to your home garden.
- I use cookie cutters in plant shapes (herbs, vegetables, flowers) for themed markers that instantly show what’s growing.
- Adding pressed leaves or flowers into the clay creates natural imprints that match the plants they’re marking.
- Mixing different colored clays creates marbled effects that stand out among green foliage.
- I stamp or carve meaningful symbols alongside plant names – like hearts for favorites or stars for new varieties.
- Painting details with waterproof acrylic paint after baking gives vibrant color that lasts multiple seasons.
- Attaching my markers to copper or bamboo stakes of varying heights creates visual interest throughout the garden
What Paints Are Safe for Clay Garden Markers?
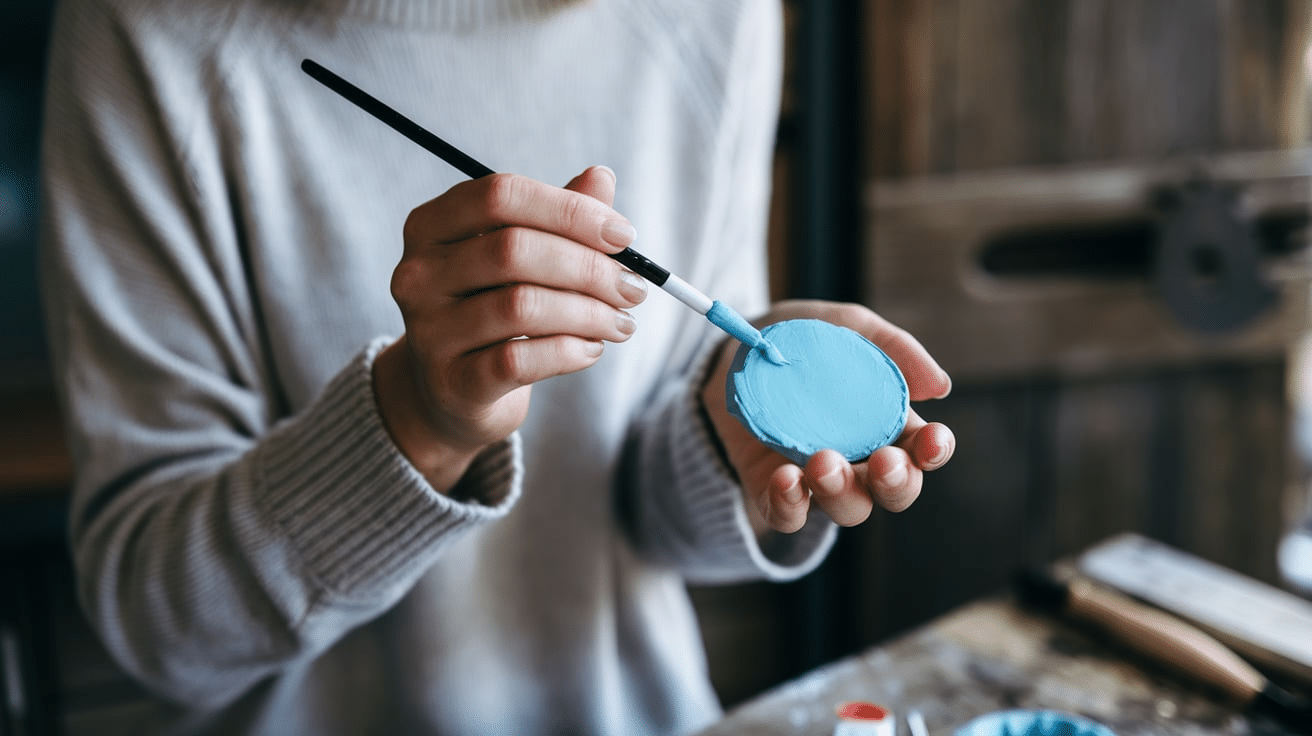
When selecting paints for my clay garden markers, I’ve learned through trial and error what truly holds up outdoors.
Acrylic paints specifically labeled as outdoor or all-weather have become my go-to choice. I’ve found that these paints adhere extremely well to baked clay and resist fading even in my sun-drenched vegetable plot.
For extra protection, I always seal my painted markers with 2-3 coats of clear outdoor polyurethane. This extra step has made a tremendous difference in longevity.
I avoid using regular craft acrylics without sealing as they quickly wash away, and I’ve completely stopped using water-based markers after watching them run during the first rain.
Oil-based paint pens have worked surprisingly well for me, especially for adding fine details or text, though they do take longer to dry.
For a more natural look, I sometimes use mineral pigments mixed with a binder, which weather beautifully, developing character over time just like the clay itself.
Why You Should Not Use Air-Dry Clay?
I experimented with air-dry clay markers in my garden but quickly found they’re not suited for outdoor use.
Unlike polymer or kiln-fired clay, air-dry varieties stay porous after hardening. In wet conditions, my markers softened and broke down within weeks, cycling through damaging wet-dry periods that caused cracking and crumbling.
Humidity created another issue as mold began growing on the markers—not ideal near my vegetables!
Even applying multiple layers of waterproof sealer didn’t help, as moisture still penetrated through tiny cracks.
Seasonal temperature changes made things worse. Winter freezes expanded trapped moisture inside the clay, splitting my markers apart. After watching my carefully crafted tags fall apart, I realized the false economy.
I now use either oven-bake polymer clay or proper ceramic clay for my markers. The slightly higher cost upfront has more than paid off with markers that last for years instead of weeks.
Key Takeaways
Making your own clay garden markers is a simple project with lasting benefits for your garden.
I’ve shared how these personalized tags not only help identify plants but also add character to your growing space in ways store-bought options can’t match.
The key takeaway?
Choose polymer or kiln-fired clay over air-dry varieties for markers that withstand the elements year after year. With the right paints and sealants, your creations will remain vibrant and functional through multiple growing seasons.
Why not set aside an afternoon this weekend to create your first batch? All you need is clay, basic tools, and your imagination.
Have you tried making clay markers before? I’d love to see your creations in the comments section below!